Introduction
 Practical Learning: Introducing the Model
- Start Blender
- Click the default cube to select it (it should be selected already).
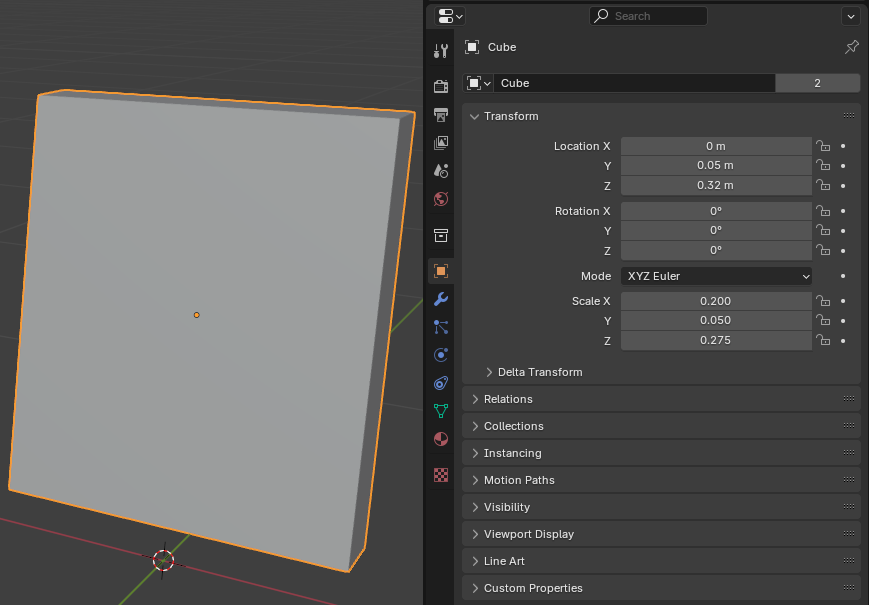
In the Properties window, click the Object button  (it should be selected already) to access the primary properties of the cube.
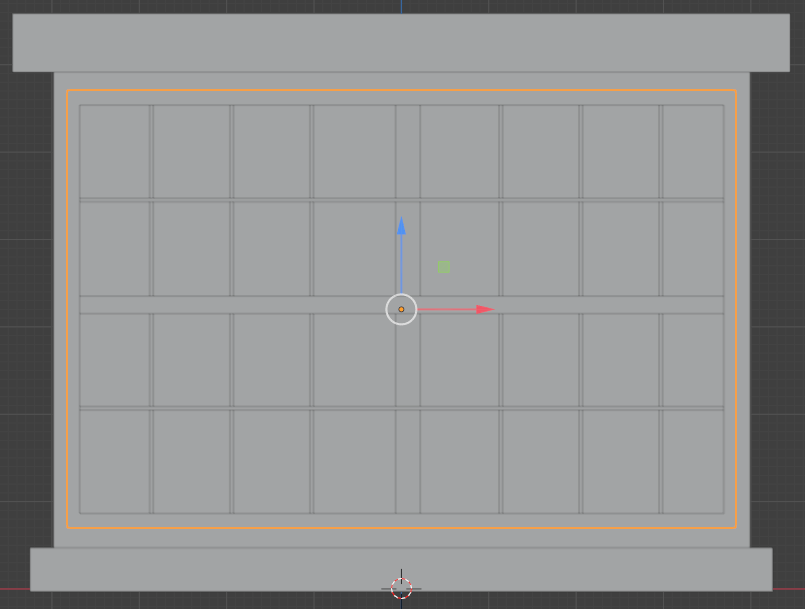
In the Object section of the Properties window, change the following values:
Location: X: 0
          Y: 0.05
          Z: 0.32
Scale:    X: 0.2
          Y: 0.05
          Z: 0.275
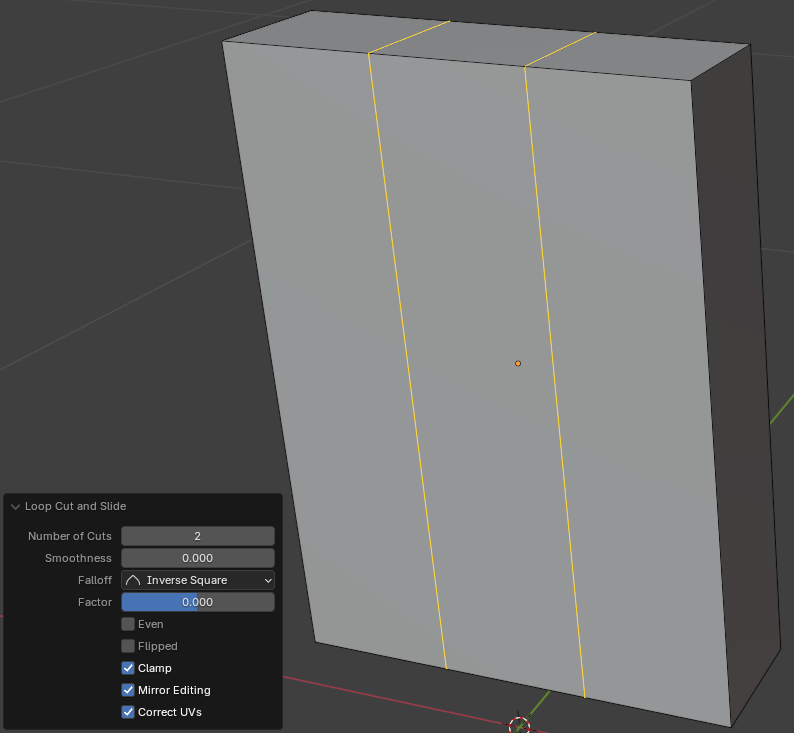
- To edit the cube, on the top-main menu of Blender, click Modeling
- On the left bar, click the Loop Cut button

- Click the top or the bottom border to create a vertical cut
- In the bottom-left side of the large Blender window, click Loop Cut And Slide window to expand its window
- Change the Number of Cuts value to 2:
Number of Cuts: 2
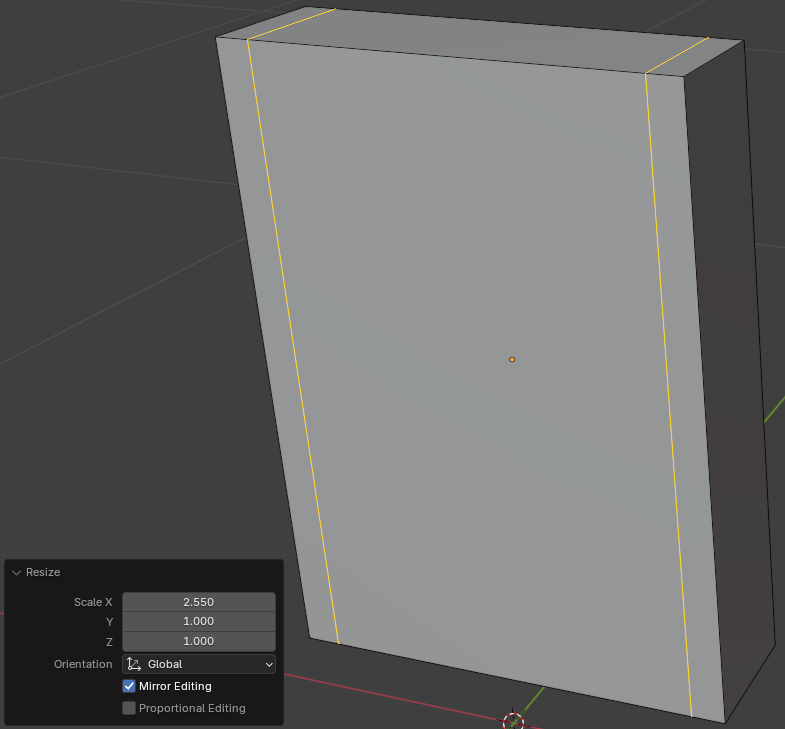
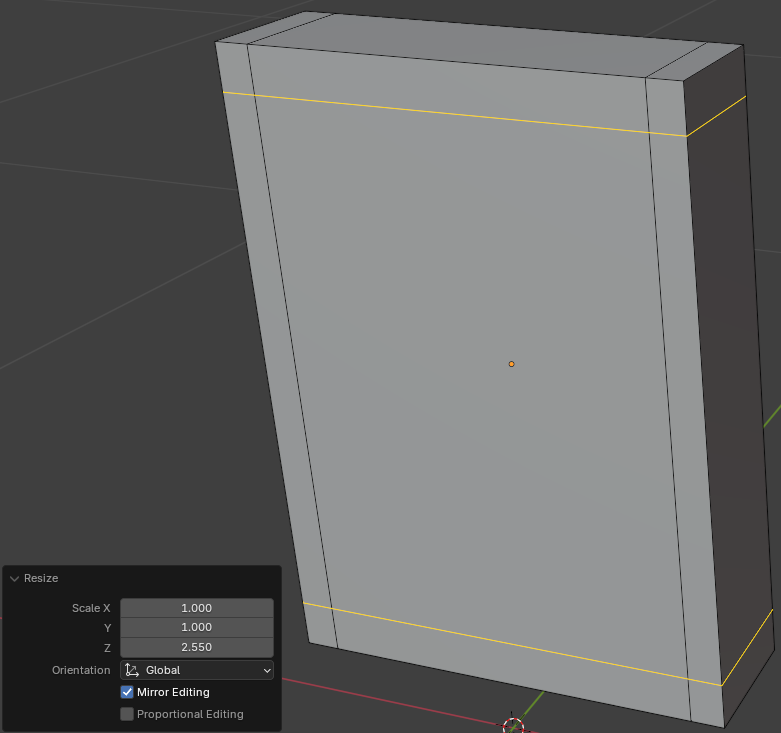
- Position the mouse in the 3D Viewport window. Then, on your keyboard, press S to resize
- Move the mouse very slightly and click
- In the Resize window in the bottom-left section of the 3D Viewport window, change the following values:
Scale: X: 2.55
       Y: 1
       Z: 1
- While the Loop Cut button is still selected, click either the left or the right border of the shape to create a horizontal cut
- In the Loop Cut window in the bottom-left section of the 3D Viewport workspace, change the Number of Cuts value to 2:
Number of Cuts: 2
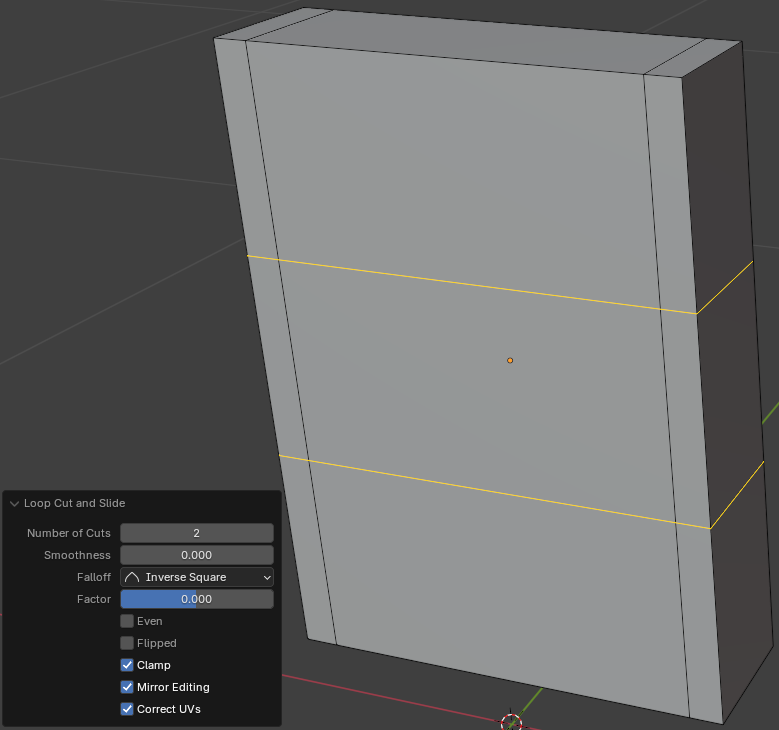
- Position the mouse in the 3D Viewport window. Then, on your keyboard, press S to resize
- Move the mouse very slightly and click
- In the Resize window in the bottom-left section of the 3D Viewport workspace, change the following values:
Scale: X: 1
       Y: 1
       Z: 2.55
- On the left toolbar, click the Select Box button

- On the top bar, click the Face button

- Click the large face in the middle of the shape to select it
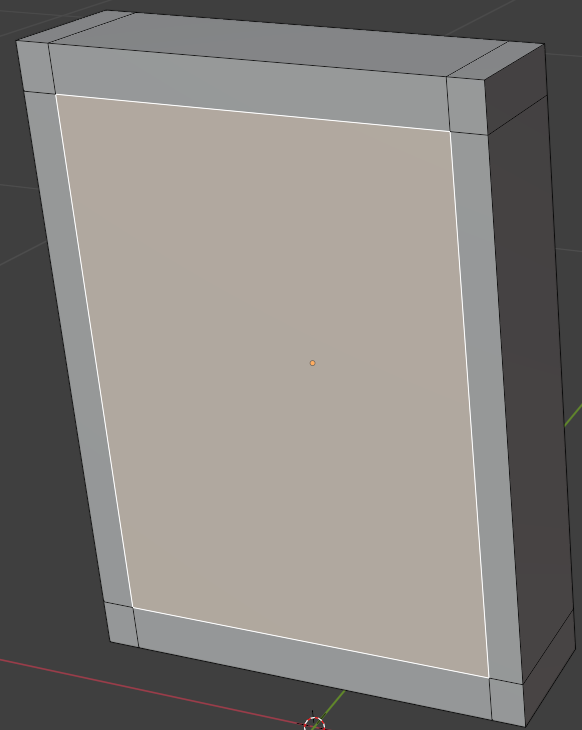
- On your keyboard, press X
- On the menu that appears, click Faces
- Click the other large face in the middle of the shape to select it
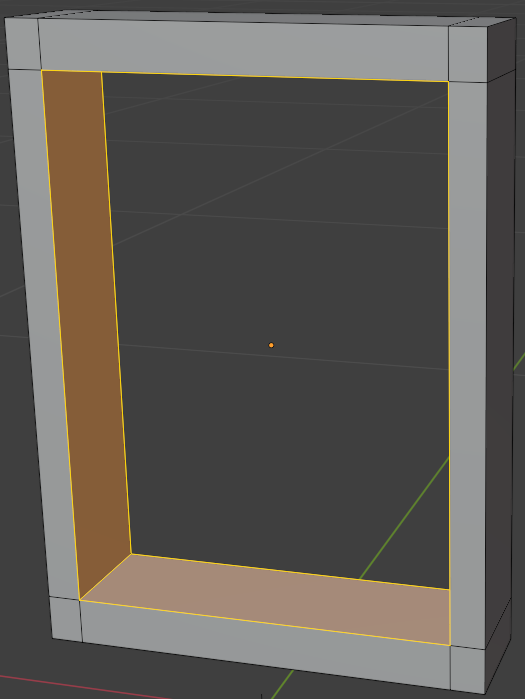
- Right-click anywhere in the 3D Viewport workspace window -> Separate -> Selection

- To confirm the separated parts, on the top-main menu of Blender, click Layout
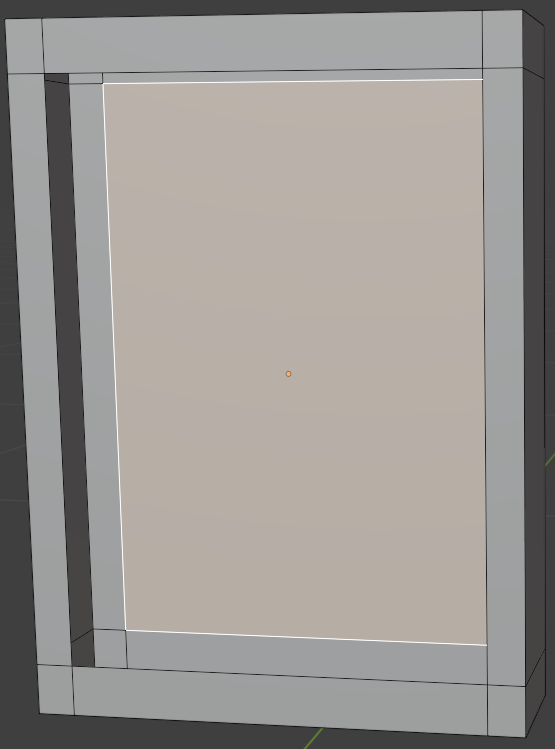
- Click the wide face in the middle of the shape to select it
- On your keyboard, press H to hide the face
- Click any border of the window to select it
- To continue editing the window, on the top-main menu of Blender, click Modeling
- On the top bar, click the Edge button

- On the window, click one of the interior edges of the opening to select it
- On your keyboard, press and hold Shift
- Click each of the interior edges of both openings of the window
- Release Shift (you can also press and hold Alt, then click one of the edges; then press and hold Shift + Alt, and click an opposing edge)
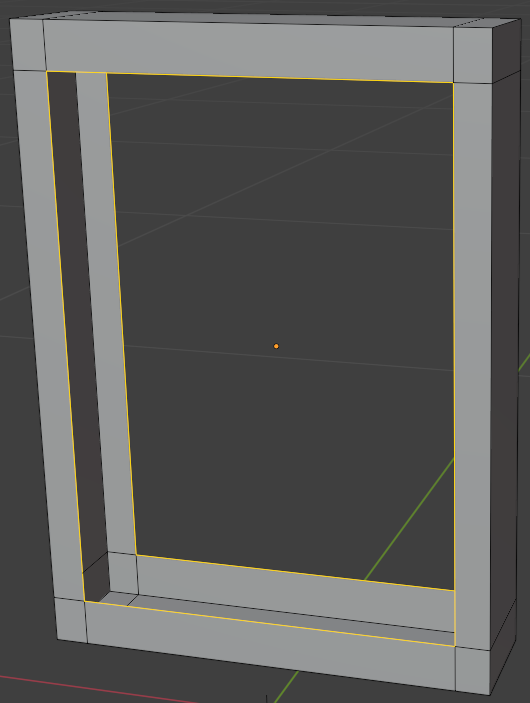
- On the menu bar, click Edge -> Bridge Edge Loops
- On the top-main menu of Blender, click Layout
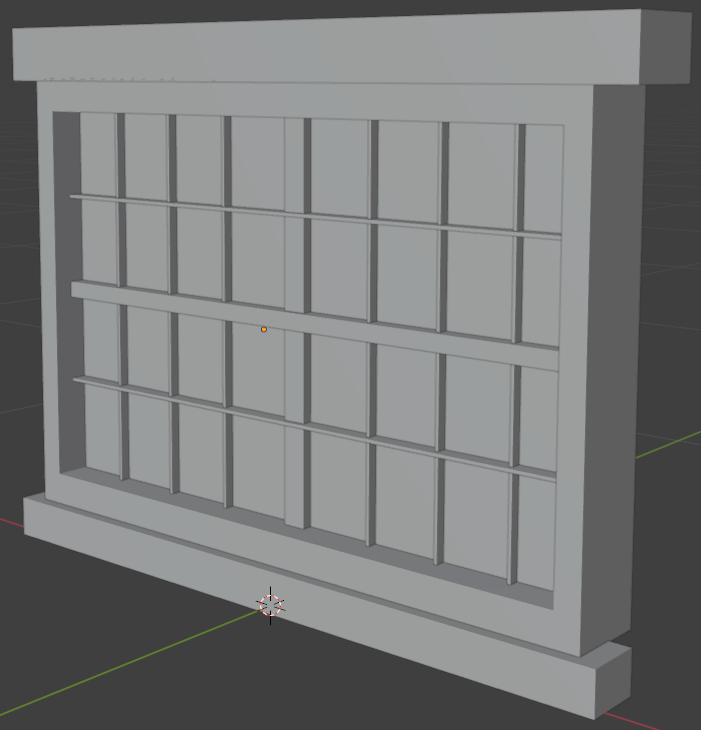
Creating Windows Bars
Practical Learning: Creating Windows Bars
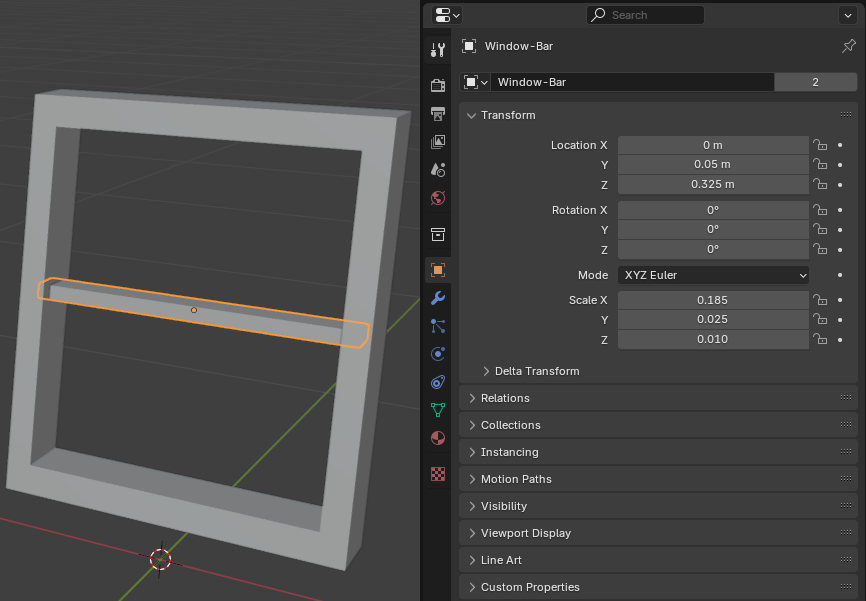
- On the top menu of Blender, click Add -> Mesh -> Cube
- In the Properties window, change the following characteristics of the window:
Location: X: 0
          Y: 0.05
          Z: 0.325
Scale:    X: 0.185
          Y: 0.025
          Z: 0.01
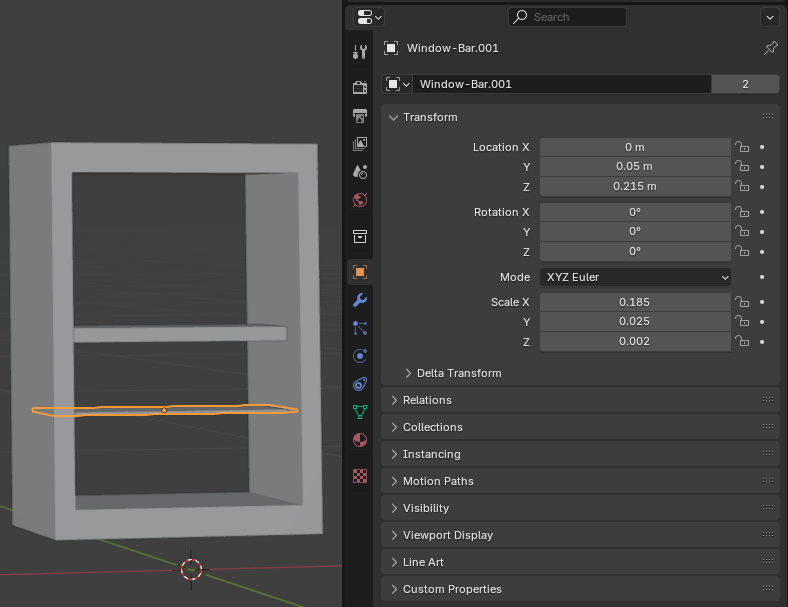
- While the new horizontal bar of the window is still selected, to duplicate it, position the mouse in the 3D Viewport window, press Alt + D and press Enter
- In the Object section of the Properties window, change the following characteristics of the new bar:
Location: X: 0
          Y: 0.05
          Z: 0.215
Scale:    X: 0.185
          Y: 0.025
          Z: 0.002
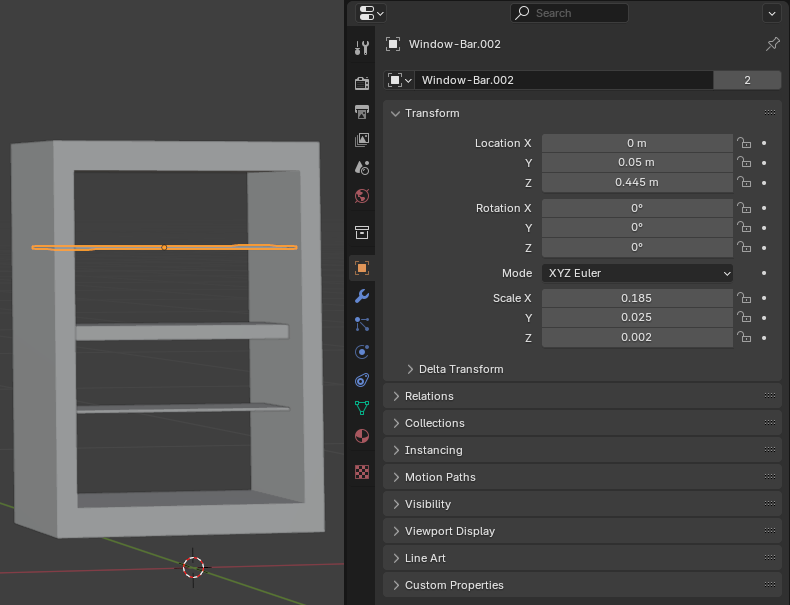
- While the small horizontal bar of the window is still selected, to duplicate it, position the mouse in the 3D Viewport window, press Alt + D and press Enter
- In the Properties window, change the following characteristics of the new bar:
Location: X: 0
          Y: 0.05
          Z: 0.445
Scale:    X: 0.185
          Y: 0.025
          Z: 0.002
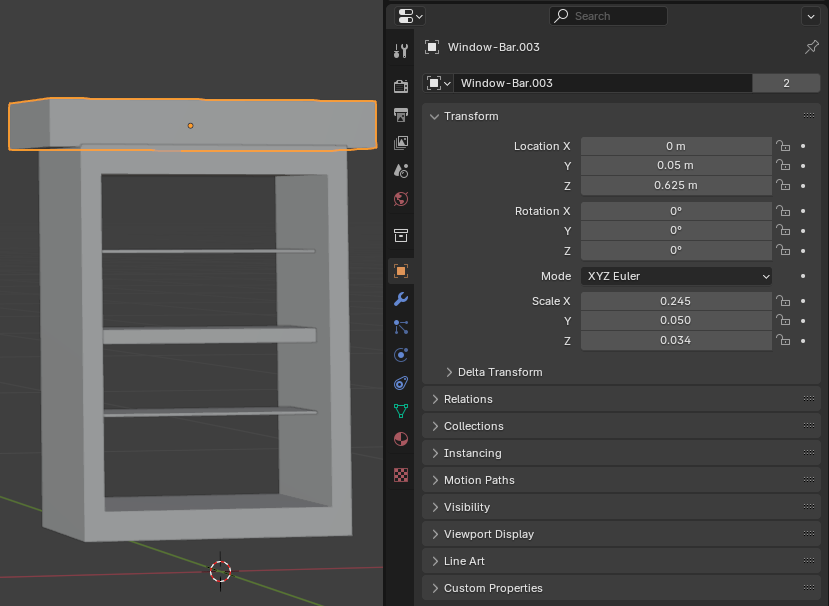
- While a horizontal bar of the window is selected, to duplicate it, position the mouse in the 3D Viewport window, press Alt + D and press Enter
- In the Properties window, change the following characteristics of the new bar:
Location: X: 0
          Y: 0.02
          Z: 0.625
Scale:    X: 0.245
          Y: 0.05
          Z: 0.0335
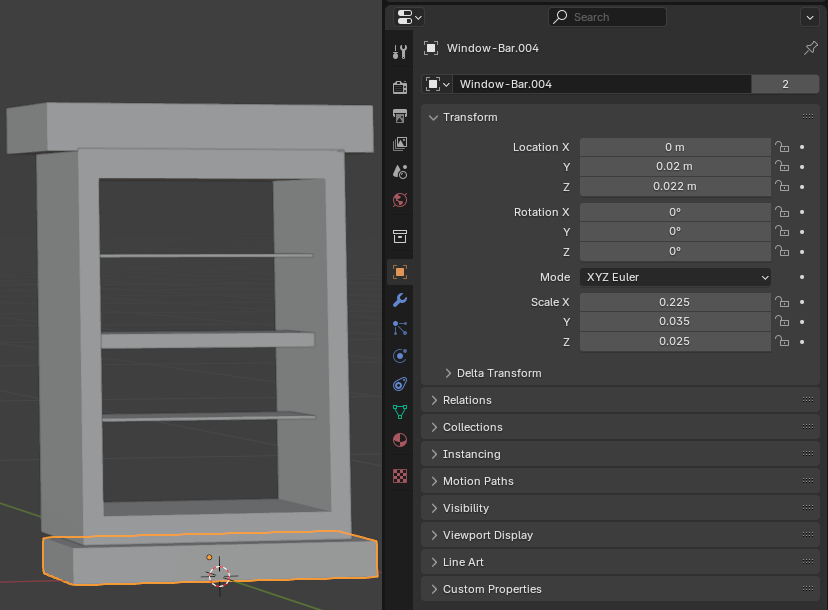
- While the top horizontal bar of the window is selected, to duplicate it, position the mouse in the 3D Viewport window, press Alt + D and press Enter
- In the Properties window, change the following characteristics of the new bar:
Location: X: 0
          Y: 0.02
          Z: 0.022
Scale:    X: 0.225
          Y: 0.035
          Z: 0.025
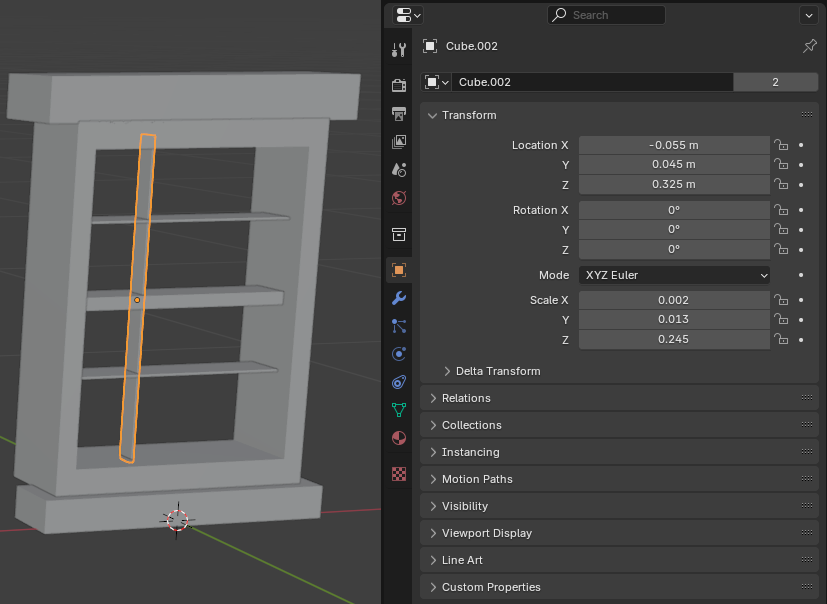
- On the top menu of Blender, click Add -> Mesh -> Cube
- In the Properties window, change the following characteristics of the window:
Location: X: -0.055
          Y: 0.045
          Z: 0.325
Scale:    X: 0.002
          Y: 0.0125
          Z: 0.245
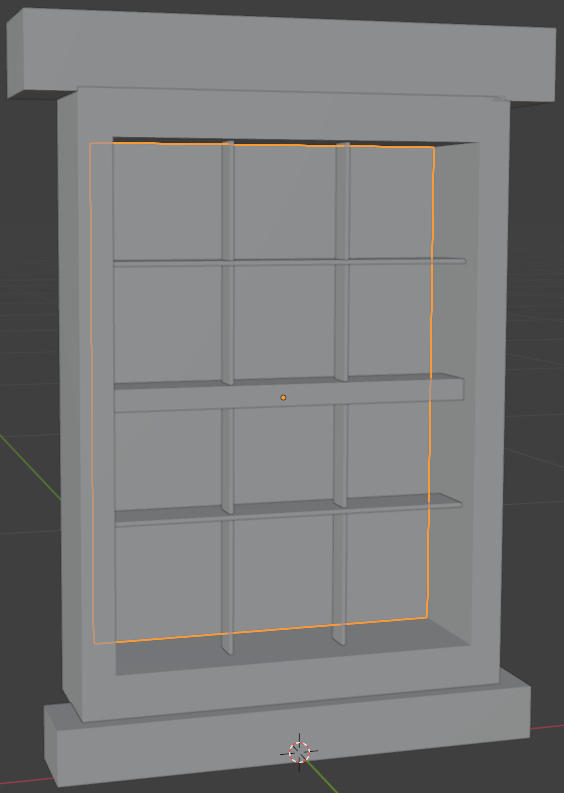
- While the vertical bar of the window is still selected, to duplicate it, position the mouse in the 3D Viewport window, press Alt + D and press Enter
- In the Properties window, change the following characteristics of the window:
Location: X: 0.055

Modeling a Window Glass
.
Practical Learning: Modeling a Window Glass
- To display the shape that was hidden, press Alt + H
- Click that face to select it
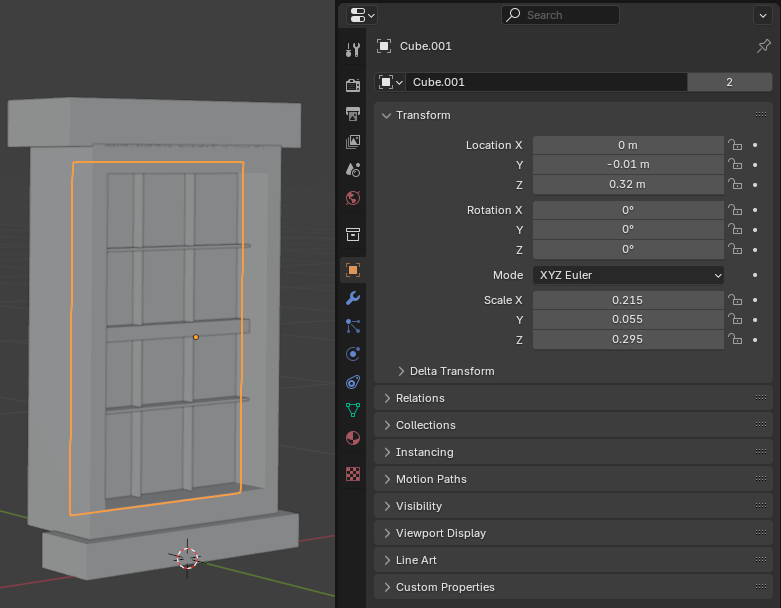
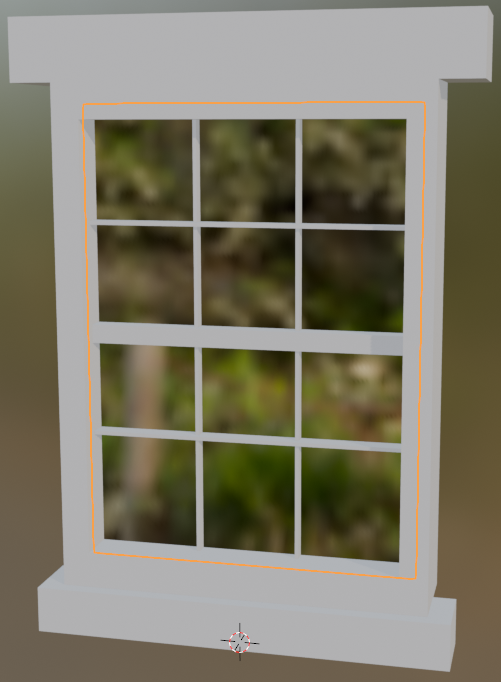
- While the interior face is selected, in the Object section of the Properties window, change the following characteristics:
Location: X: 0
          Y: -0.1
          Z: 0.32
Scale:    X: 0.215
          Y: 0.055
          Z: 0.295
Setting the Materials for the Window
Practical Learning: Setting the Materials for the Window
- To access the materials for the window, on the top-main menu of Blender, click Shading
- In the Shading toolbar, you should have a material specified already. If not, lick the New button.
In the Shading toolbar, click Material to select it
- To specify the name of the material, type Window-Frame and press Enter
- On the Shading toolbar, click the New Material button

- On the Shading toolbar, click the new Window-Frame.001 to select it
- Type Window-Glass and press Enter
- In the Principled BSDF window, click the button of Transmission to expand it
- Still in the Principled BSDF window, change the following values:
Base Color:
         RGB: Red:   1
              Green: 1
              Blue:  1
Roughness:    0
IOR:          1.115
Transmission: Weight: 1
- Click any border of the window to select it
- On the Shading bar, click the arrow of the Browse Material combo box
 and select Window-Frame
- Click any of the vertical bars that were created inside the window select it
- On the Shading bar, click the arrow of the Browse Material combo box and select Window-Frame
- Click any of the horizontal bars that were created on the window select it
- On the Shading bar, click the arrow of the Browse Material combo box and select Window-Frame
- Click the face inside the window to select it
- On the Shading bar, click the arrow of the Browse Material combo box and select Window-Glass
- On the top-main menu of Blender, click Layout
- To save the lock, on the main menu, click File -> Save
- Set the document name Window-Simple-1
- Click Save Blender File
Extending the Window
Practical Learning: Introducing the Model
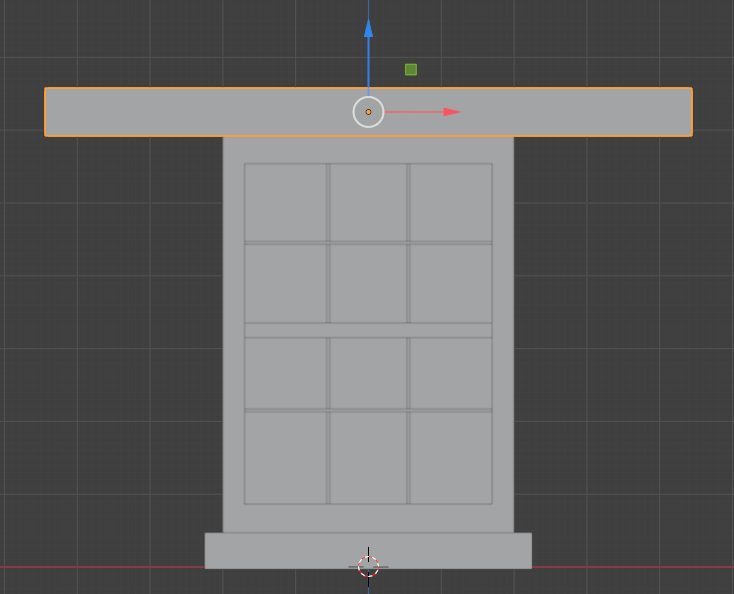
- Click the top bar to select it
- In the Object section the Properties window, set scale X value to 0.445:
Scale: X: 0.445
       Y: 0.05
       Z: 0.335
- Click the bottom bar to select it
- In the Object section the Properties window, set scale X value to 0.425:
Scale: X: 0.445
       Y: 0.05
       Z: 0.335

- Click the frame of the window to select it
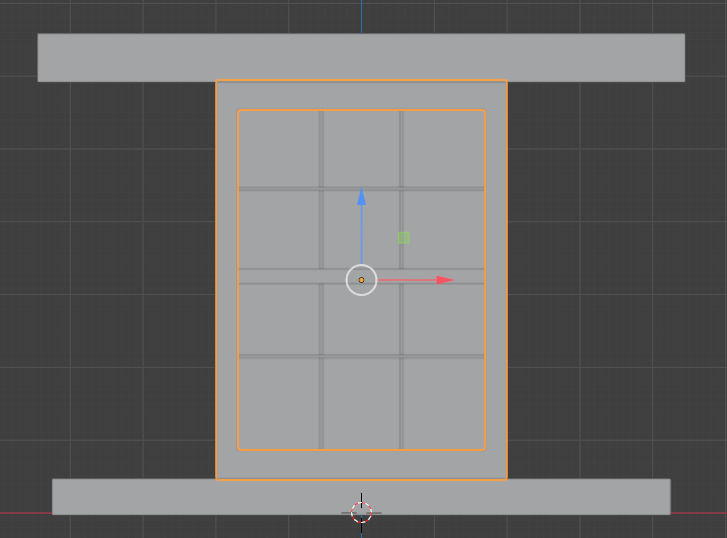
- To edit the cube, on the top-main menu of Blender, click Modeling
- On the top menu, click View -> Viewpoint -> Front
- On the right side of the top toolbar, click the X-Ray button

- Draw a rectangle to select the right border of the frame of the window:

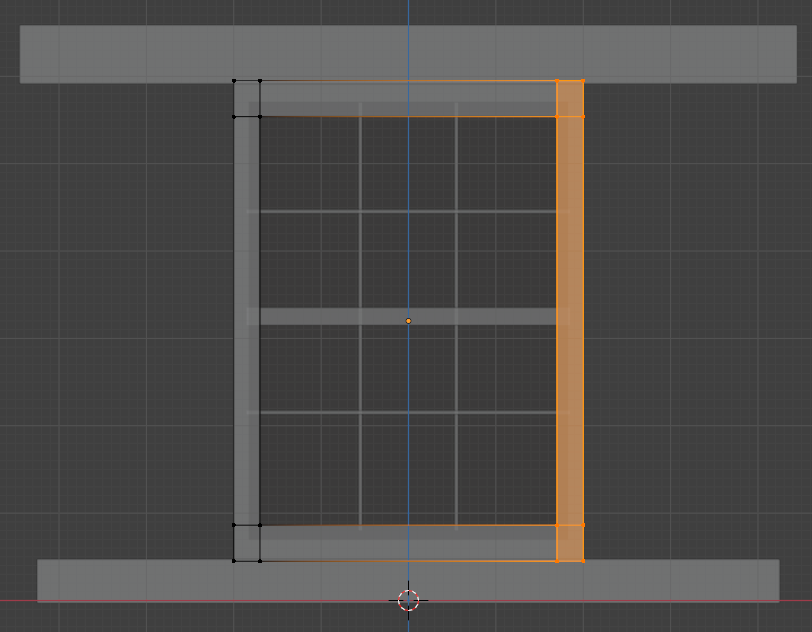
- On the left toolbar, click the Select Box button
- Click and drag the red-X arrow to the right. Then release the mouse, as follows:

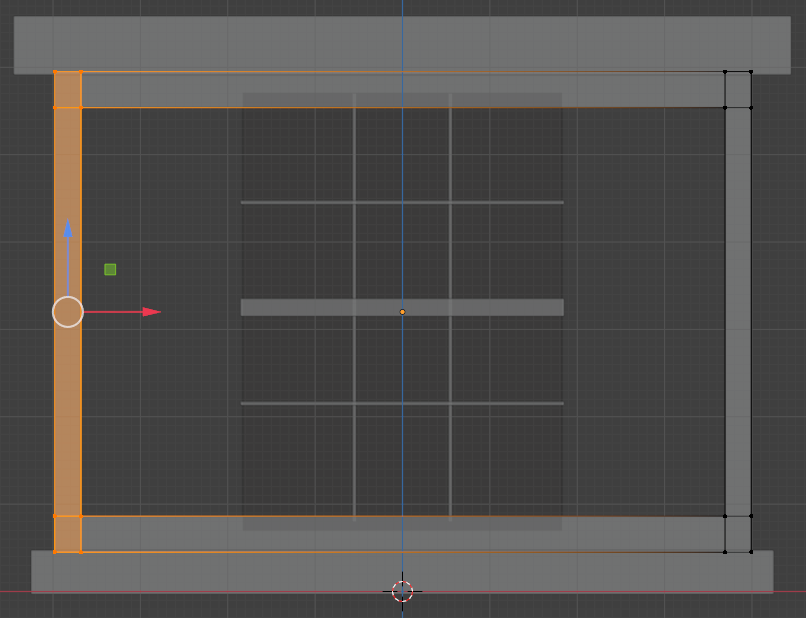
- Draw a rectangle to select the left border of the frame of the window:
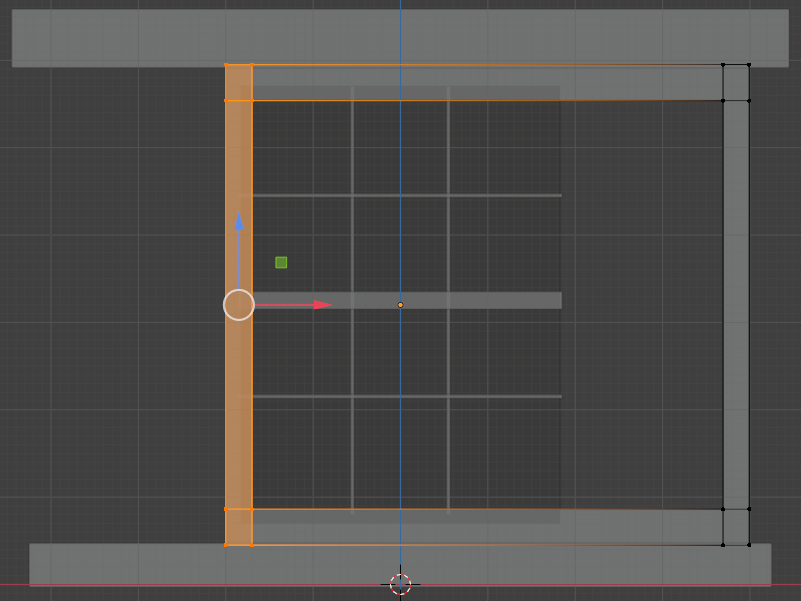
- Click and drag the red-X arrow to the left. Then release the mouse, as follows:
- To confirm the separated parts, on the top-main menu of Blender, click Layout
- Click each of the horizonta bars and, in the Object section of the Properties window, set their X scale to 0.385:
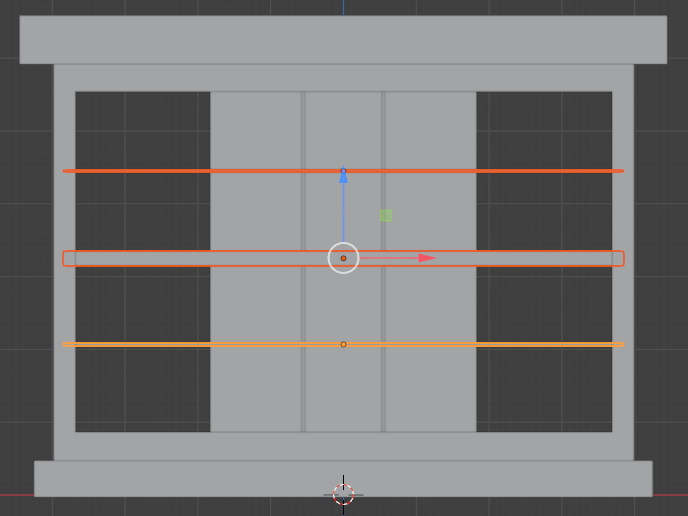
- Click one of the vertical bar to select it. Widen it (by pressing S, then X, then moving the mouse away slightly and clicking). Then position it in the middle of the window
- Click the other vertical bar and move it between the left border of the window and the middle bar
- On the toolbar of the Properties window, click the Modifiers button

- In the Modifiers section of the Properties window, click Add Modifier -> Generate -> Array
- Enlarge the middle glass of the window
- Finalize the window as follows:
- To save, on the main menu, click File -> Save As...
- Set the file name as Window-Simple-Extended-1
- Click the Save As button