
Managing Data Fields
 |
Managing Data Fields |
Table Design and Fields
Introduction
So far, to get acquainted with database fields, we have used two techniques of creating a table and some techniques of adding fields to a form. One of the techniques we used, the Datasheet View, provides a very simplistic way. The Datasheet View is mainly used to perform data entry or to test some fields. It has so many limitations that you will hardly use it. For example, you cannot control or customize the behavior of fields if you create the table in Datasheet View. The other technique we used, the Table Wizard, allows you to use some already created and customized fields. For one thing, you would not know what exactly those fields are configured to do and whether they can control data entered in them. For another thing, if you do not like the way they behave, you would have to modify the existing configuration that was already done. This is why you should know how to design your tables.
Table Design consists of creating a list of columns, specifying the type of information they can receive, and controlling their behavior. To design a table, you should display it in Design View, which is a display other than Datasheet View. To create a new table in Design View, on the menu bar, you can click Insert -> Table. You can also click the arrow of the New Object button
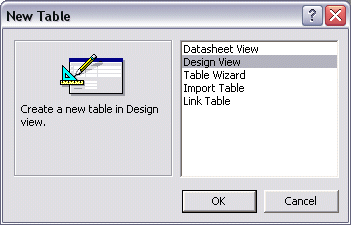
on the Database toolbar and select Table. As another alternative, you can click the New button on the Database Window's toolbar while in the Tables section. Any of these actions would call the New Table dialog box. In the New Table dialog box, you can click Design View and click OK.
The quickest way to create a table in Design View when using Microsoft Access 2000 and later versions is to double-click the Create Table In Design View link from the Database Window.
![]() Practical Learning: Introducing Table Design
Practical Learning: Introducing Table Design
The Table in Design view
The title bar of a table in Design View presents the table’s icon on the left section. Like most other windows, the table's icon holds the table's system menu. This system icon can also be double-clicked to close the table. The long empty section of the title bar is different from a classic window. Instead of being used to maximize, minimize, move, or close the table, it provides features adapted for the database object it is. For example, at a minimum, it can be used to switch views. To use its function, you can right-click it. This would present a menu you can select from:

The right section of the title bar presents the system buttons of a regular window. They can be used to minimize, maximize, restore, or close the table.
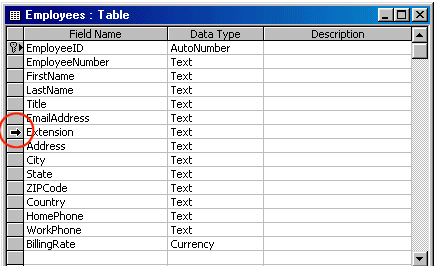
On the left side of the view, the row headers allow you to select a row completely. The top left gray button allows you to select everything on the table while in Design View:
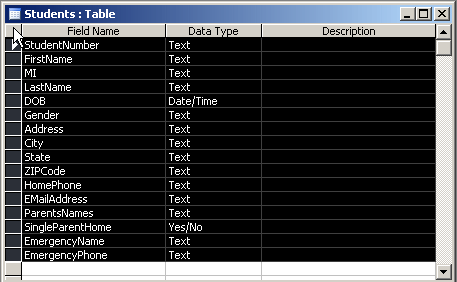
The Field Name column is used to type a name for each field. The rules we used when in Datasheet View apply here. A field can have any name but keep a name with one word and no space.
![]() Practical Learning: Creating Columns in Design New
Practical Learning: Creating Columns in Design New

Field Renaming
One of the jobs involved with database design and maintenance is to review fields and make sure they are explicit enough for the user. There are three issues related to a field's name. Some fields, as you will find out, are involved in relationships, and you will have to be careful when deciding to change their name. The other issues are related to a field's actual name and its caption. |
 |
A field's name is mainly made of two parts from the developer's standpoint: the actual name and the caption. A field's name is stored as part of the table and is involved with any business dealing the table has to cope with. The caption simply guides the user in identifying the use of a particular field. These two items are not strictly related. For example, you could have a field whose name is SocSecNbr while its caption displays Nat Number From Gvt and this will not affect the functionality of the table. Overall, as a developer, you should pay attention to your fields names because these are the names you will refer to when performing calculations and other programming issues.
To rename a field in Datasheet View, use any of the techniques we learned to change a field's name. After you have typed the name, the new name will replace the old one. To rename a field in Design View, click it and type the new name.
![]() Practical Learning: Renaming a Field
Practical Learning: Renaming a Field
| First Name | Last Name | Title | Extension | Billing Rate |
| Christine | Barley | Administrative Assistant | 106 | 16.82 |
| Joseph | Kumar | Network Administrator | 105 | 20.65 |
| Joanne | Herbie | Accountant | 108 | 22.48 |
Field Selection in Table Design View
In the Design View of a table, there are various types of operations you can perform for database maintenance. Operations include naming or renaming fields, moving or deleting fields, and changing various other properties. In order to perform some of the operations on a field or a group of fields, you must first select one.
Column Moving in Table Design View
The columns of a table are displayed in the sequence in which they were created. We learned earlier how to change this sequence in Datasheet View. You can also change the sequence of fields in the Design View of a table.
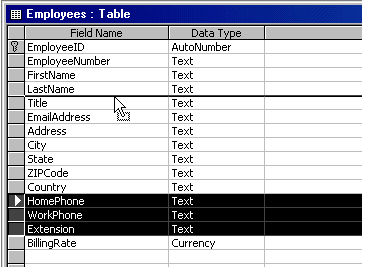
To move a column or a group of columns, after making the selection, click the gray box of the field name or one of the gray boxes of one of the selected fields and hold the mouse down. Then drag up or down. A horizontal line will guide you. Once it gets to the desired location, you can release the mouse.
![]() Practical Learning: Maintaining Fields in Table Design View
Practical Learning: Maintaining Fields in Table Design View

Field Insertion
|
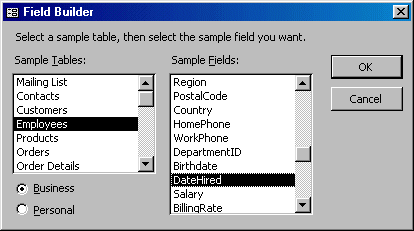
When it comes to tables, the best place to add new fields is in Design View because this view provides more flexibility. In Design View, you can insert a new field at any position. You can also add a new field to the end of the table, a feature that is not available in Datasheet View. You can also use one of the same fields as we saw when using the Table Wizard:
|
 |
![]() Practical Learning: Inserting New Fields in Table Design View
Practical Learning: Inserting New Fields in Table Design View
Field Deletion
When in Design View, you can delete a field you don't need anymore or if it was added by mistake. To delete a column, you can right-click anywhere on its line (on the Field Name, the Data Type, or the Description columns) and click Delete Rows. When a column has focus, you can also click the Delete Rows button on the Table Design toolbar to delete it.
![]() Practical Learning: Deleting a Field in Table Design View
Practical Learning: Deleting a Field in Table Design View
|
|
||
| Previous | Copyright © 2002-2019, FunctionX | Next |
|
|
||