|
Introduction to Server Configuration
|
|
|
Server Configuration Tools
|
|
|
|
When you have finished installing Microsoft Windows
Server 2008 R2, a window titled Initial Configuration Tasks may come up:
|

The Initial Configuration Tasks window is used to perform
the most fundamental or routine operations of Microsoft Windows Server 2008 R2.
This window displays when the computer starts. If you don't want to come up like
that, click the bottom check box. If it doesn't come up when the computer
starts, to restore this window, click Start -> Run, type oobe and press Enter.
After installing the operating system, there are a few
things you should (must) do before continuing:
- You must make sure the computer is connected to the
Internet
- If this is the first computer, you must make it a domain controller (this
is not a requirement if the computer will not be a domain controller; if you
don't (yet) know what a domain controller is, don't worry about that now)
Every computer in the network must have a name. The
installation gives a default name that you can accept or change. Some
installations, such as Small Business Server, prompt you to accept or
specify the name of the server. After installing Microsoft Windows
Server 2008, to check and/or change the name of the server:
- In the Initial Configuration Tasks window, click Provide Computer Name and
Domain:

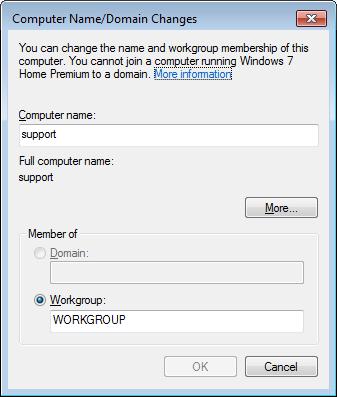
- In the Computer Name property page, click Change...
- Accept or change the name of the server
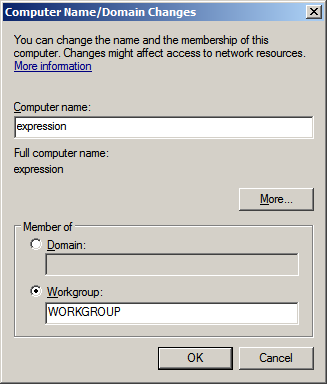
- Click OK
- A dialog box will ask you to restart your computer. Click OK
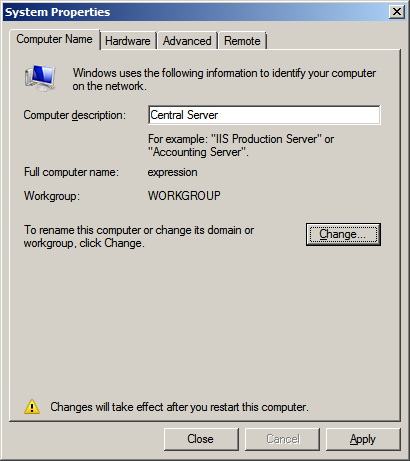
- Click Close
- Click Restart Now
Network discovery makes it possible for a computer to allow
other computers to "see" it on the network. To take care of it on the server,
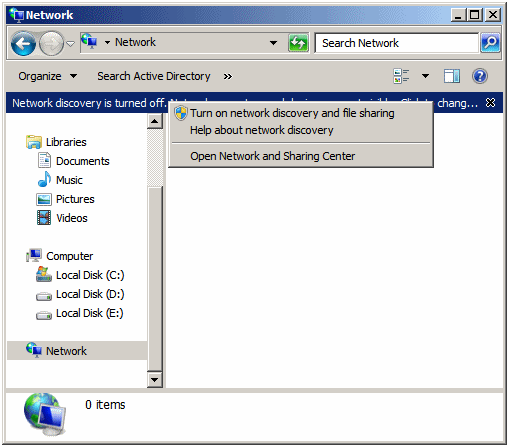
start Windows Explorer and click Network (you can click the Start button and
click the Network option). A message should appear under the toolbar stating
"Network discovery is turned off...":

Click that message and click "Turn on network
discovery and file sharing":
You should receive a message box presenting you two
options:

Click "Yes, turn on network discovery...". If some computers are already installed and connected
to the same router, their names may appear in the Network node in Windows
Explorer.
|
Connecting the Server to the Internet
|
|
Normally, when you have fiinished installing the
server, if everything went alright and the computer is connected to a
router, you should be connected to the Internet. To test it, you can start
the browser (Internet Explorer), set the address to
http://msdn.microsoft.com, and
press Enter.
You should make sure your installation of the
operating system can regularly get its updates from Microsoft. To take
care of this:
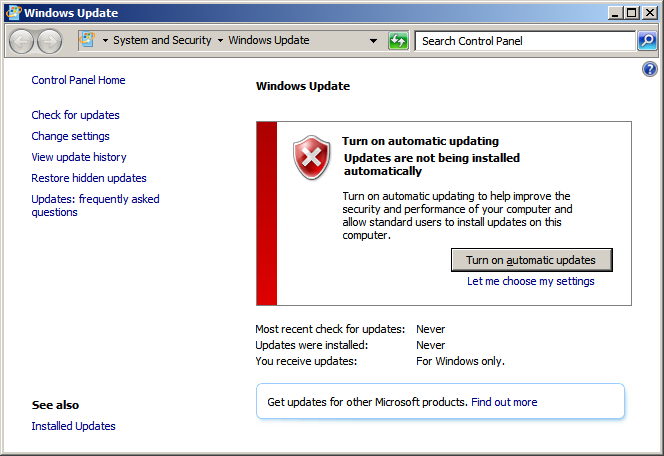
- Click Start -> All Programs -> Windows Update
- A windows will display, asking you to enable automatic updates.
Click
Turn On Automatic Updates
You may be asked to install new updates. Do.
|
Assigning an IP Address to the Server |
|
Every computer on the network needs an IP address so
that other computers of the network can locate it (just like every house
needs a physical address so that the post office and other people can find
it).
A computer has two main ways of getting an IP address:
- A server, called a DHCP server (the word "server" here represents an
application; it doesn't have to be a different server than the one you
installed), can automatically assign (provide) an IP address to each
computer
- You can manually assign an IP address to each computer. Of course,
you need to know a little bit about something named TCP/IP, which
means you would need to know how to create and assign IP addresses
To assign an IP address to a server (that runs
Microsoft Windows Server 2008 R2):
- In the Initial Configuration Tasks, click Configure Networking
- On the Taskbar, click Start and click Network. In the left frame,
right-click Network and click Properties. Click Local Area Connection.
In the Local Area Connection Status dialog box, click Properties
To assign an IP address to the server:
- Click Start
- Right-click Network and click Properties
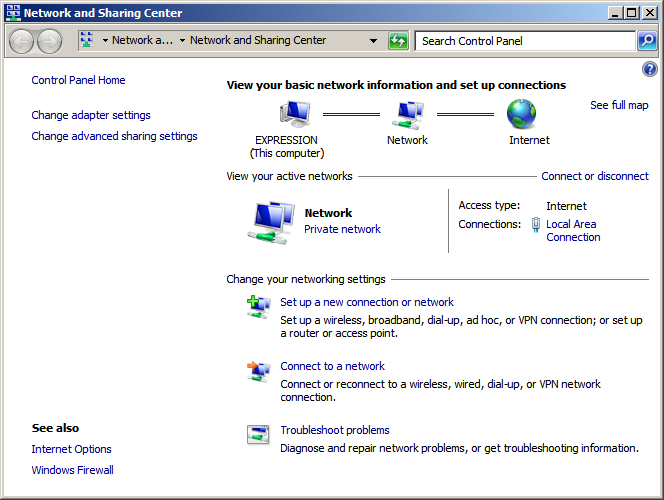
- Click Local Area Connection
- Click Details. Make note (on a piece of paper) of the address on
the right side of IPv4 Address:
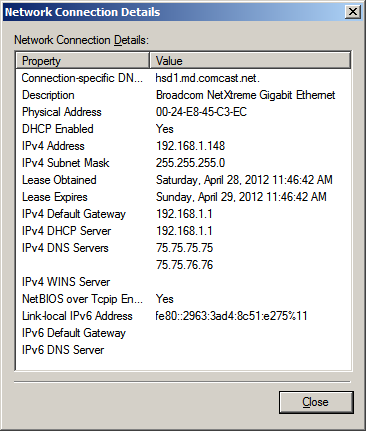
(For our example, we are building a small network and we will just use
a small range of IP addresses. In the real world or for a large
network, you would need to actually know TCP/IP, design a range of IP
addresses you plan to use, then assign those IP addresses, or design a
way to assign the IP addresses to the computers)
- Click Close
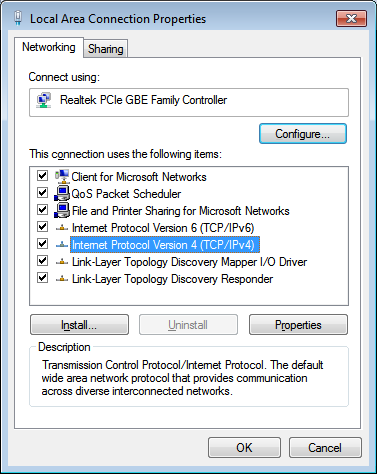
- In the Local Area Connection Status dialog box, click Properties
- In the checked list box, click Internet Protocol Version 4
(TCP/IPv4)
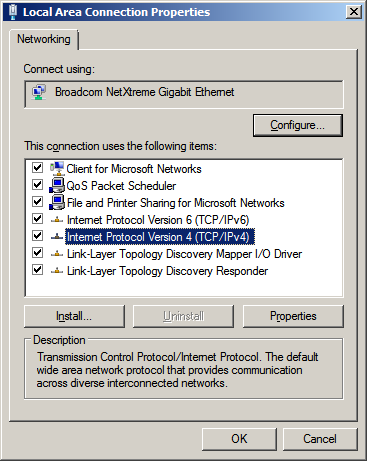
- Click Properties
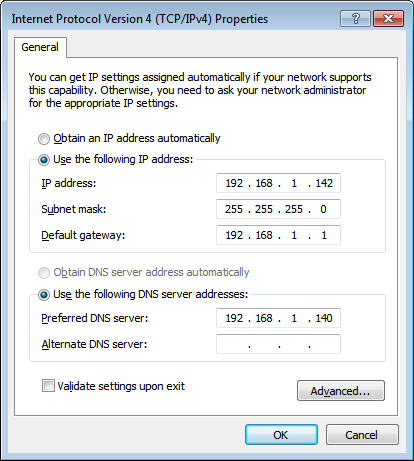
- Click Use the Following IP Address
- Type the IP address you want the server to use. For our example,
and based on the above dialog box, we type 192.168.001.001
- Press Tab
- Type the subnet mask (normally, it should be added automatically
when you press Tab from the previous IP address text box) and press
Tab
- Type the default gateway address (use the first and the second
octets of the IP address you had provided (such as 192.168) and use
001.001 for the other two bytes)
- Provide the Preferred DNS server address (we use 127.0.0.1 for our
example) and the Alternate DNS Server address (we leave ours empty)
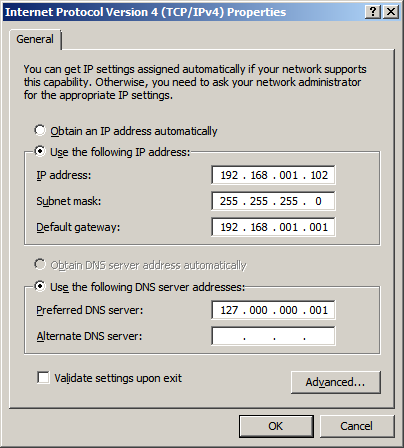
- Click Advanced to check the values that were put in the IP
Settings and DNS property pages
- Click OK
- Click OK
- Click Close
- Click Close
|
A Domain Name System (DNS)
|
|
As you may know already, whether it belongs to a network or
not, every computer must have a name. Furthermore, if it belongs to a network, a
computer must provide a way to be found by other computers. This can be done
using its name. This means that other computers must be able to contact other
fellow computers using the names.
In a network, to exchange information or to share
resources, computers communicate using languages also called protocols.
One of the languages or protocols is called Transmission Control Protocol
or TCP. Another language is called Internet protocol or IP. These two
languages are usually used together in a combination named TCP/IP.
To locate each other using TCP/IP, each computer must
have an address, named an IP address, made of a combination of numbers
separated by periods. An example is 192.168.1.248. Each computer has such
a number (address) but the number (the address) assigned to a computer
must be unique among the numbers used by other computers. As a result, a
computer can be contacted using its address. In a large network with
dozens or hundreds or thousands of computers, it can be combursome to keep
track of these complex numbers. A solution is to use software, named a
server, so that, if you provide the name of the computer, the server can
"translate" the name into the corresponding computer that use the actual
IP address of the computer.
The Domain Name System, named DNS, is a language
(again, named a protocol) that allows the server that receives (or is
provided) the name of a computer. Then the server checks a list (called a
table) that has the names of computers and their corresponding IP
addresses. That way, the server can locate, through the IP address, the
intended computer.
To make this description possible in your network, you
can install an application named DNS server. To do this:
- From the Initial Configuration Tasks, click Add Roles
(an alternative is to click Start -> Server Manager, then in the left
frame, right-click Roles and click Add Roles)- In the first page of the wizard, titled Before You Begin, read the
text and click Next
- In the second page of the wizard, click the check box of DNS Server
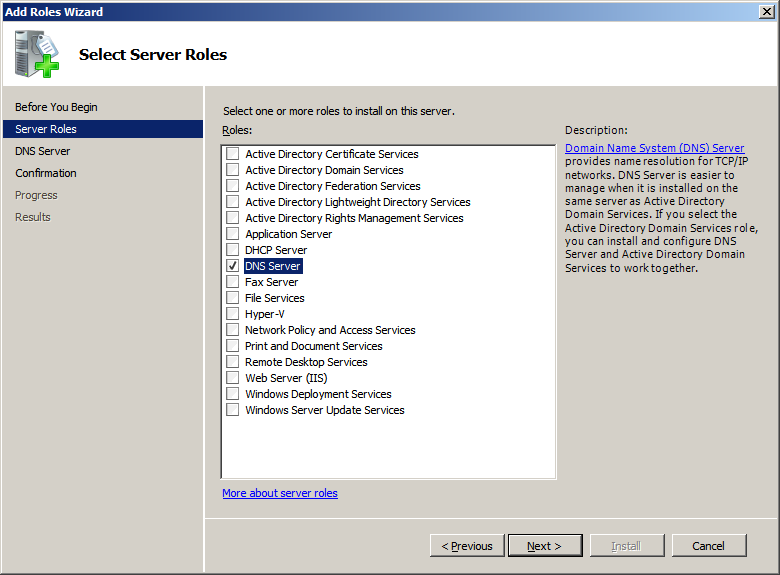
- Click Next
- In the third page of the wizard, titled DNS Server, read the text
and click Next
- Click Install
|
Creating a Domain Controller
|
|
If you are creating a new network, one of your
computers should (must) be able to manage access to the computers and resources that belong to the network. That is,
a central computer, named a server, must be able to allow or deny access
(this is called authentication) of the network and its resources to people. That central
computer, that server, is named a domain controller. The first server you
install usually should (must) be made a domain controller.
To create a domain controller, you must promote your
server (to a domain controller). To do this:
- Open the Command Prompt (Start -> Command Prompt, or Start -> All
Programs -> Accessories -> Command Prompt
- Type CD\ and press Enter to return to the root of the disc
- Type dcpromo (which stands for Promote This Computer to a Domain
Controller) and press Enter
- A small window will come up:
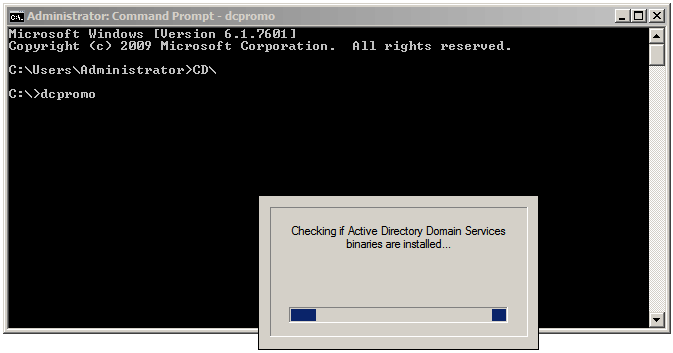
A wizard will start:
In the first page of the wizard, read the
text and click Next

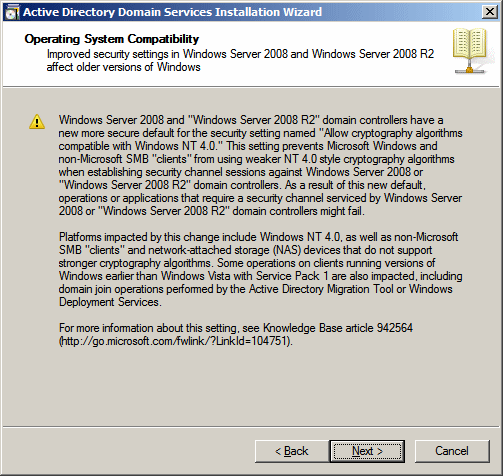
- In the second page of the wizard, read the text and click Next
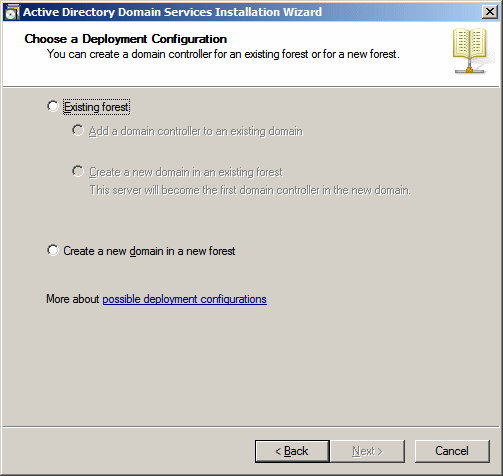
- In the third page of the wizard, click Create a New Domain In a
New Forest
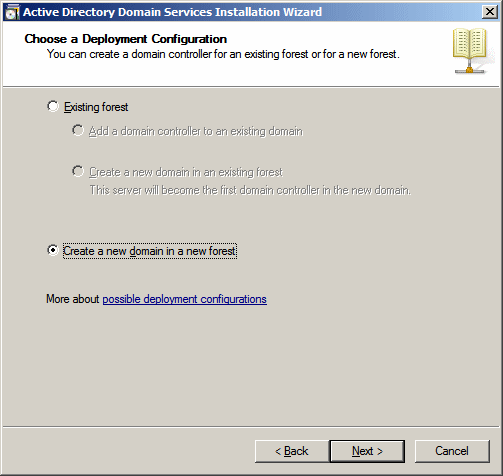
- Click Next
- The next page asks you to create a fully-qualified domain name
(FQDN). Enter a
name made of two or three parts. Examples are example.local or learning.example.com.
Remember that the computer already has a name and every computer on
the network has or will have a name. So this is what will happen with
the name you give:
- If you give a name in two parts such as example.local or example.com, the
network name to use from a browser to access this computer will be ThisComputerName.example.local or ThisComputerName.example.com.
This means that this is the name the other computers will use to "intranetly" or "webly" access
its resources. This means that, later on, you can create a web site stored in
a computer (in a server or a workstation), share resources of that computer,
and make those resources available so that other computers can access those
resources from a browser
- If you give a name in three (or more) parts such as support.example.local or intranet.example.local or WhatSUp.example.local or support.example.com or intranet.example.com or WhatSUp.example.com or
anything like those, the
network name of this computer will be ThisComputerName.support.example.local or ThisComputerName.intranet.example.local or ThisComputerName.WhatSUp.example.local or ThisComputerName.support.example.com or ThisComputerName.intranet.example.com or ThisComputerName.WhatSUp.example.com. That's
the name the other computers will use to access this computer from a browser
There is no rule as to whether the name you use (in two parts or more parts) is bad. You just have to decide and keep
the scheme in mind.
For our example, we are using functionx.local
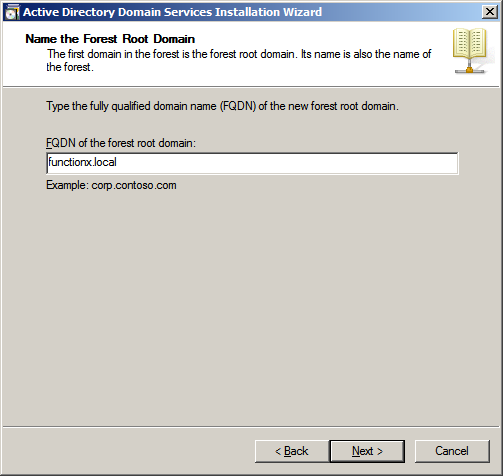
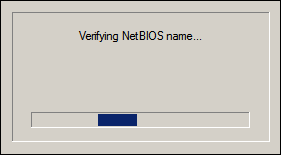
- After specifying the FQDN, click Next. A window will
start some operations:
- When a dialog box comes up, read its text and click Next
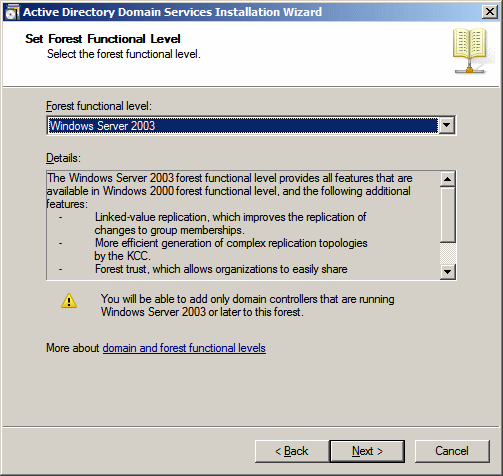
- On the next page, read the text and click Next. A window will come
and start performing some operations:
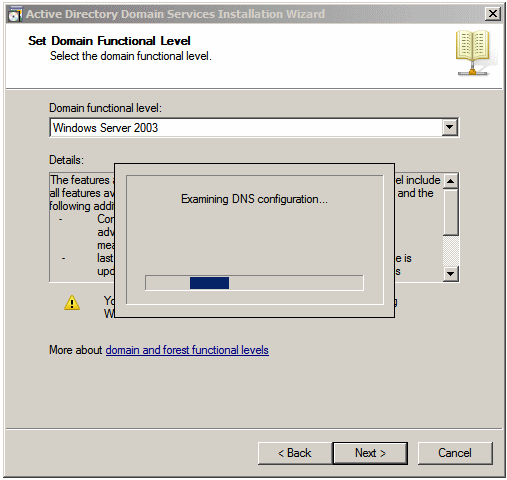
- Click Next
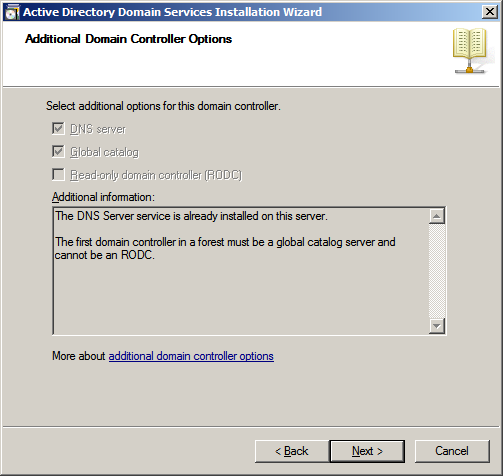
- Click Next. If you didn't create (assign) an IP address on (to)
the server, a dialog box will come up, about IP address assignment:
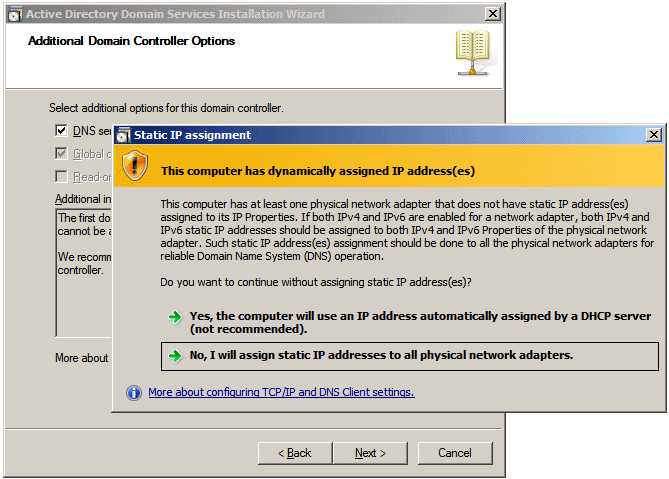
In you didn't assign an IP address to the server, it means you plan to
use a DHCP server that will automatically assign
IP addresses to the computers of the network. In this case, click Yes, ...
- A dialog box comes up
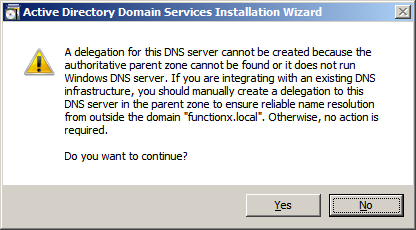
- Read the text and click Yes
- In the next page of the wizard, click Nest
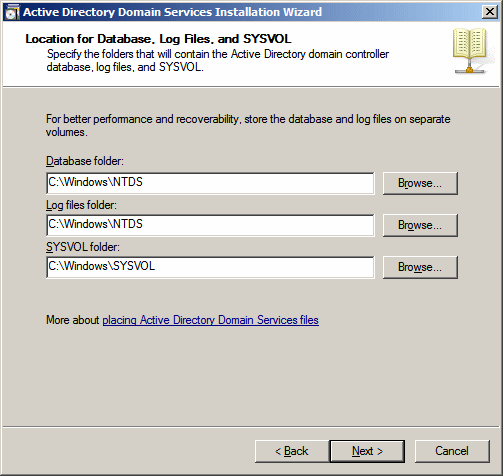
- The next page asks you to specify the administrator's password.
Click the Password text box and type the password
- Click the Confirm
Password text box and type the same password
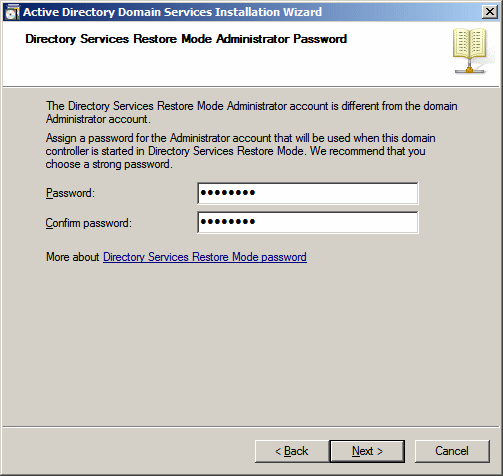
- After specifying the password, click Next
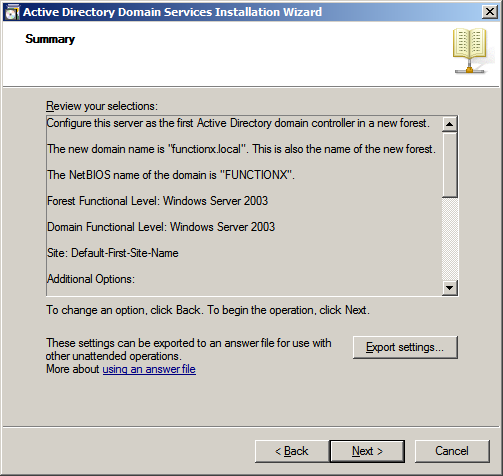
- Click Next. A new dialog box will startperforming an operation:
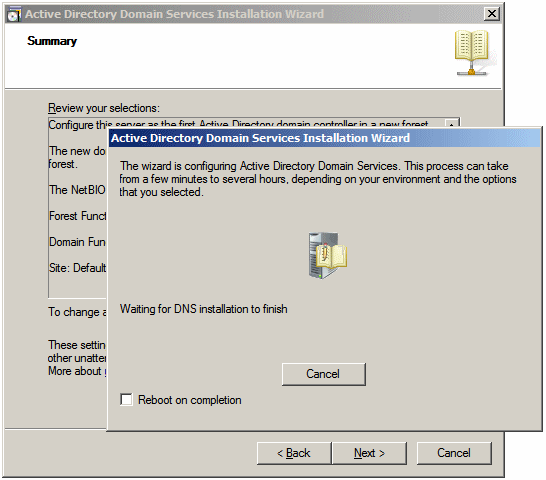
This may take a while

- Click Finish
- A new dialog box will ask you to reboot:
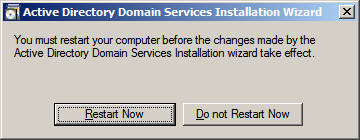
Therefore, click
Restart Now
- When the computer comes up, press CTRL + ALT + DELETE and log in
When you have finished installing Microsoft Windows
Server 2008 R2, a window titled Initial Configuration Tasks may come up:

The Initial Configuration Tasks window is used to perform
the most fundamental or routine operations of Microsoft Windows Server 2008 R2.
This window displays when the computer starts. If you don't want to come up like
that, click the bottom check box. If it doesn't come up when the computer
starts, to restore this window, click Start -> Run, type oobe and press Enter.
After installing the operating system, there are a few
things you should (must) do before continuing:
- You must make sure the computer is connected to the
Internet
- If this is the first computer, you must make it a domain controller (this
is not a requirement if the computer will not be a domain controller; if you
don't (yet) know what a domain controller is, don't worry about that now)
|
Assigning an IP Address to a Client |
|
As you may know already, every client of a network needs an IP address so
that other computers of the network can locate it. You may also know that
a computer can get its IP address from a DHCP server or you can manually
assign an IP address.
To assign an IP address to a computer that runs
Microsoft Windows 7:, click Start -> Computer (or click Control Panel). On
the left, right-click Network and click Properties. If you are using a
laptop, click Wireless Network Connection. If you are using a desktop,
click Local Area Connection.
To assign an IP address to a server (that runs
Microsoft Windows Server 2008 R2):
- In the Initial Configuration Tasks, click Configure Networking
- On the Taskbar, click Start and click Network. In the left frame,
right-click Network and click Properties. Click Local Area Connection.
In the Local Area Connection Status dialog box, click Properties
The following section is optional, especially if you
are working on a small network. To create the IP address for the server:
- Click Start
- Right-click Network and click Properties

- Click Local Area Connection
- Click Details. Make note (on a piece of paper) of the address on
the right side of IPv4 Address:

(For our example, we are building a small network and we will just use
a small range of IP addresses. In the real world or for a large
network, you would need to actually know TCP/IP, design a range of IP
addresses you plan to use, then assign those IP addresses, or design a
way to assign the IP addresses to the computers)
- Click Close
- In the Local Area Connection Status dialog box, click Properties
- In the checked list box, click Internet Protocol Version 4
(TCP/IPv4)

- Click Properties
- Click Use the Following IP Address
- Type the IP address you want the server to use (for our example,
and based on the above dialog box, we type 192.168.001.102) and press Tab
- Type the subnet mask (normally, it should be added automatically
when you press Tab from the previous IP address text box)
- Type the default gateway address (use the first and the second
octets of the IP address you had provided (such as 192.168) and use
001.001 for the other two bytes)
- Provide the Preferred DNS server address (we use 127.0.0.1 for our
example) and the Alternate DNS Server address (we leave ours empty)

- Click OK
- Click Close
- Click Close
A computer network has to be managed. Some aspects can be
done manually and some others electronically. In order to do anythinig, you must
have a user account that can perform the necessary tasks. Such an account must have appropriate
rights on the network.
To create the primary account to manage the network,
on the server:
- Click Start ->
Administrative Tools -> Active Directory Users and Computers (if a message
box comes up, click Continue)
- If necessary, in the left frame, expand the name of the
domain.
Click Users
- In the left
frame, right-click Users -> New -> User
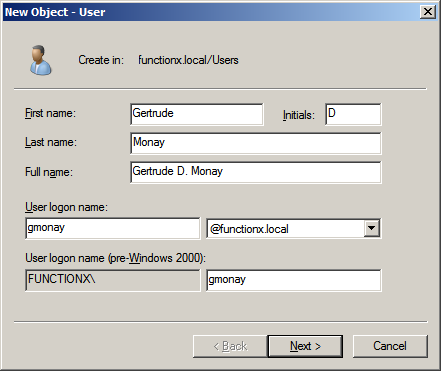
- Type the first name of the user and press Tab. If you have a
middle initial, type it and press Tab
- Type the last
name
- Click the User Logon Name text box and type a user name. Here is an example:
- Click Next
- In the next page of the wizard, type the password as Password1
- Press Tab and type the same password. Here is an example:

- Click Next
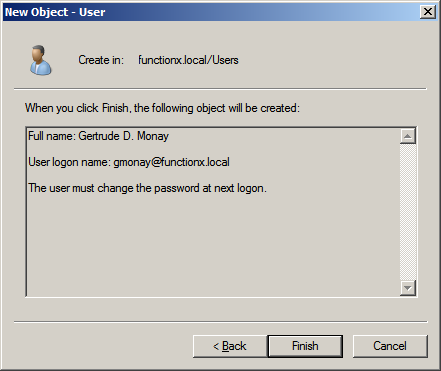
- Click Finish
|
Making a User Account an Administrator
|
|
Some of the operations you will perform on the network
require that the account have the appropriate rights (also called
permissions). An administrator's account is one that can do anything on
the network, such as creating users accounts or adding computers to the
network.
To make a user account become an administrator, on the
server:
- Click Start -> Administrative Tools -> Active Directory Users and
Computers
- In the left frame, expand the domain's node
- Click Users
- Double-click the user name whose rights you want to manage (or
right-click that user name and click Properties)
- Click Member Of
- Click Add...
- In the bottom text box (where the caret is blinking), type admin.
- Click Check Names
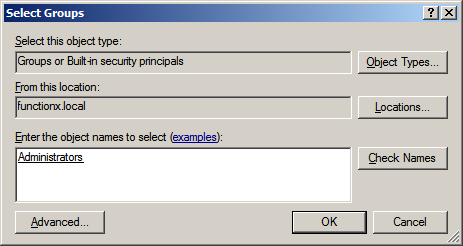
- Make sure Administrators is selected and underlined.
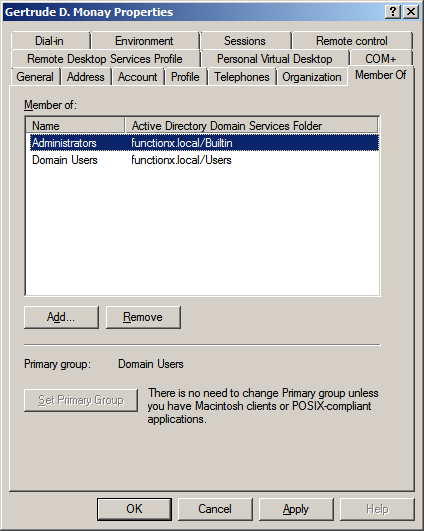
Click OK
- Click OK
|
Logging In to the Network
|
|
To use the network, a user must log in. This is done
by provinding a user name and a password. If this is the first time you
are logging in, you may be asked to change your password.
If you are logged but you want to use another account,
you can switch to another account. To do this:
- Click Start -> Switch User
- Press CTRL + ALT + DELETE
- Click Other User
- Type the user name (such as the one you created earlier) and press Tab
- Type the password (such as Password1 if you are continuing from
the account created earlier) and press Enter
- If this is the first time you are logging in, a message will tell you that you must change the password. Click OK
- Type a good password for the account and press Tab
- Type the password again and press Enter.
A message will inform
you that your password has been changed
- Click OK
|
Optionally Creating a Computer Account
|
|
After creating a domain, you can can add client
computers to it. In our examples, we will add workstations that run
Microsoft Windows 7 Professional, Ultimate, or Enterprise. There are two actions to adding a
client to a Microsoft Windows Server 2003 domain but only one is required.
Before physically or electronically adding a client to
a domain, you can first create a computer account for it. To create a
computer account, you can also click Start -> Administrative Tools -> Active
Directory Users And Computers. This would open the Active Directory
Users and Computers window. In the left frame, expand the name of the
domain. Right-click the name of the domain -> New -> Computer.
This would open the New Object -
Computer dialog box. In the Computer Name text box, enter the name of the
computer. The operating systems before Windows 2000 don't use very long
names. Therefore, when naming a computer, keep this in mind and give a
name made of fewer than 15 characters. After naming the computer, click
Next twice and click Finish.
Instead of right-clicking the name of the domain, in
the Active Directory Users And Computers, you can expand the name of the
domain, right-click the Computers node -> New -> Computer. As
mentioned already, in the first page of the New Object - Computer wizard,
you can type a name for the computer. Here is an example:

Then click OK. After creating an account for a computer, you can add
it to the domain. Actually, primarily creating an account for a computer is not required.
|
Checking the Computer Name and Domain
|
|
Always make sure you know the name of each computer on
your network and the name of the domain it belongs to.
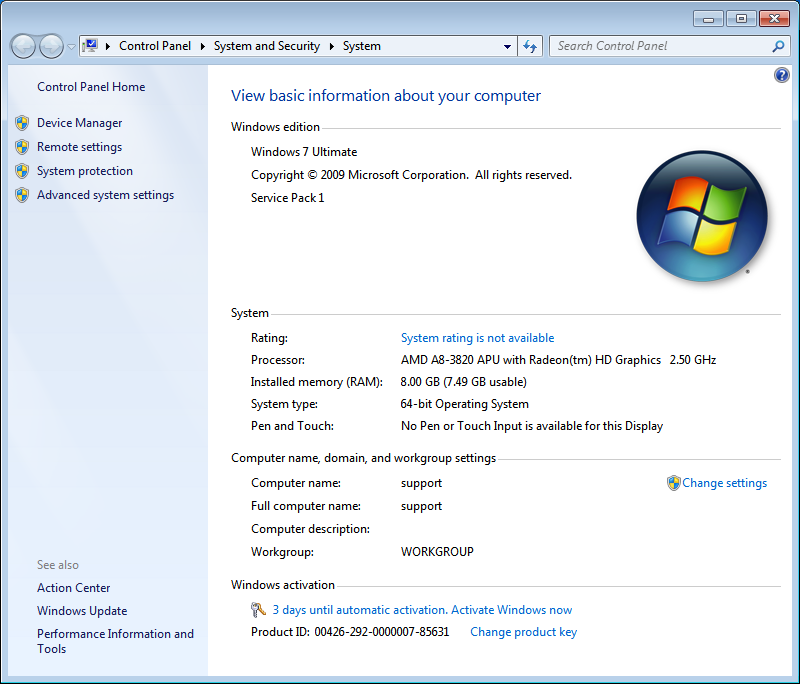
To check the name of the computer and its domain on a
workstation:
- Click Start
- Right-click Computer and click Properties
To check the name of the server, in the Initial Configuration
Tasks, look on the right side of Full computer Name
To check the name of the document of the server, look
on the right side of Domain


