|
 Practical Learning: Using the AutoContent Wizard
|
|
-
To start an instance of Microsoft PowerPoint, from the Taskbar, click
Start ->
(All) Programs
-> Microsoft PowerPoint
- On the menu, click File -> New...
- On the right side, under New, click From AutoContent
Wizard.
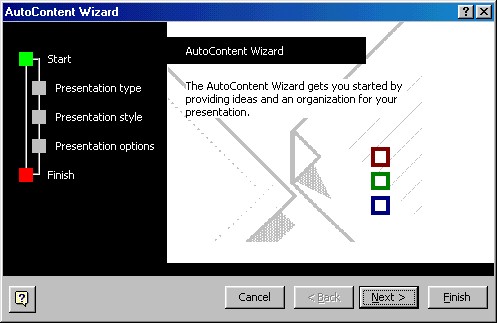
The first
page of the AutoContent Wizard appears:

- Click Next
- In the following dialog, you will choose the type of
presentation you want the AutoContent Wizard to initialize for you. To select a
presentation, you have two options. If you click the All button, all the
presentation templates will display on the list. On the other hand, you can
select a category of presentation by clicking the appropriate button. Either
way, click a particular presentation from the list and proceed to the next
dialog.
For this exercise, click the Projects button, then click
Project
Overview from the list

- Click Next
- Once you choose the type you want, you will be asked to
choose the type of output you want:

Accept the On-Screen Presentation radio button and click Next
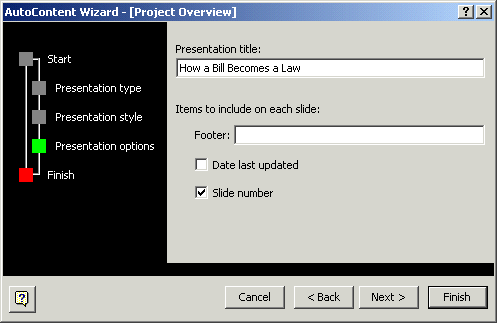
- The next dialog will ask you to give a title and a
footer for your presentation. In the Presentation Title text box, type How a Bill
Becomes a Law
- Make sure the Footer text box is empty. Clear the Date Last Updated check box

- Click Next
- After you click next, the AutoContent Wizard will have gotten
all the necessary answers to initialize your presentation:

Click Finish
- To save the presentation, on the Standard toolbar, click the Save
button

- Locate your Microsoft PowerPoint Exercises folder and
display it in the Save In combo box
- In the File Name combo box, accept the name as How a Bill
Becomes a Law
and click Save
|
The Presentation Templates |
|
A template is an already created and formatted product
that you can use to quickly perform a task. In the case of Microsoft
PowerPoint, a template is a presentation that has already been created
with text outline, formatting effects, and other-related issues that are
the basis for time-consuming design. Most of the templates provided by
Microsoft PowerPoint are professionally done and you can simply use them
to customize your presentation. The only aspect you would really need to
change is the text included in the
slides.
In the above section, we learned to use AutoContent
Wizard to work from one of the designs that Microsoft PowerPoint ships
with. To create a
presentation using one of the readily made designs, on the main menu, you
can click File -> New... Then, on the right section, under New,
click From design template.
Another technique you can use is to open an existing
presentation, one that has a design you like or that the company you are
working for already has. After opening it, you can either modify the
contents of each slide, which allows you to preserve the other individual
design of each slide, or you can delete all slides, except the first and
another slide. You should not delete the first slide because it usually
has a unique design as compared to the other slides. You should preserve
one of the other slides because (as we will learn when studying the Master
Slide) it has a design that is shared by the rest of the slides of the
presentation.
|
 Practical Learning: Creating a Presentation Based on a
Template
|
|
- To create a new presentation using an existing design, on the main
menu, click File -> New...
- On the right side, under New, Click From Design Template
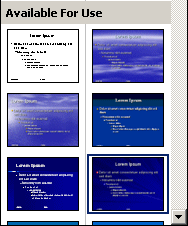
- On the right side, click the design on the 1st column - 3rd row

- Notice the display in the Preview section.
In the right section, scroll down and the 13th design (1st column -
7th row) and observe the Preview
- To save the presentation, press Ctr + S
- Locate your Microsoft PowerPoint Exercises folder and
display it in the Save In combo box
- In the File Name combo box, replace the name with Building an
Aircraft
- Click Save
|
A Presentation From Scratch |
|
As mentioned in previous lessons, a presentation is
primarily a series of slides created as an ensemble inside of one
document. If you use either the AutoContent Wizard or the templates, a presentation with
already made text in different slides would be created for you. Most of
the time, if not always, that text will not suit you. After such a
creation, you can change the text as you see fit. In some cases, you would
have to create your own text, especially if you are the initiator of the
presentation. In some other cases, you will be handed the contents of
slides that you can or must use. For a customized presentation, you may
have to create everything from scratch.
|
A Presentation From Scratch |
|
To create a presentation from scratch, you can use one
of the following options:
- If you are just starting Microsoft PowerPoint, it automatically
creates an empty presentation and you can start customizing it
- On the
Standard toolbar, you can click the New button. This would present you
an empty slide you can start customizing
- On the main menu, you can click File ->
New... On the right side, you can click Blank Presentation
|
|

