|
As you are probably aware already, columns are used to
organize data by categories. Each column has a series of fields under the
column header. One of the actual purposes of a table is to display data that is
available for each field under a particular column. Data entry consists of
providing the necessary values of the fields of a table. Data is entered
into a field and every time this is done, the database creates a row of
data. This row is called a record. This means that entering data also
self-creates rows. Except for any unknown reason I can't think of, when
using the Data In Table window from the Enterprise Manager, you
will never have to create rows of a table. They are created automatically
as the user is entering data.
There are four main ways you can perform data entry
for a Microsoft SQL Server table:
- You can use a table from the Enterprise Manager
- You can enter data by typing code in the SQL Query Analyzer
- You can import data from another object or another database
- You can use an external application such as Microsoft Access, Microsoft
Visual Basic, Borland C++ Builder, Microsoft Visual C++, Borland Delphi, Microsoft
Visual Basic .NET, C#, Visual C#, J#, etc.
|
|
Using the Enterprise Manager |
|
|
Probably the easiest and fastest way to enter data
into a table is by using the Enterprise Manager. Of course, you must first
open the desired table from an available database. In the Enterprise
Manager, after
selecting the database and the Tables node, to open a table for data
entry, right-click it, position your mouse on Open Table, and click Return
All Rows. If the table does not contain data, it would appear with one
empty row. If some records were entered already, their rows would show and
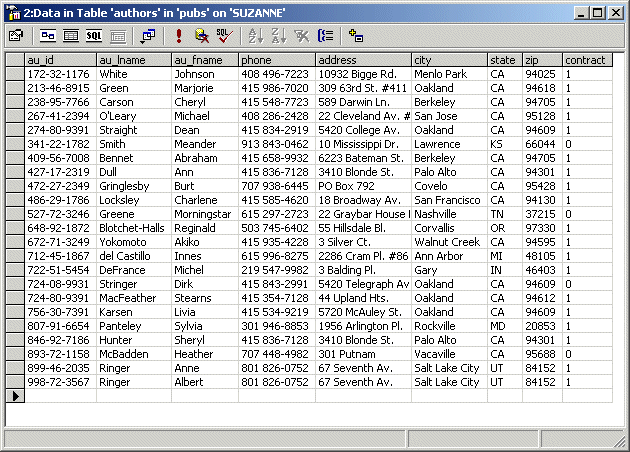
the table would provide an empty row at the end, expecting a new record: |

|
To perform data entry on a table, a user would click
in a field. Each column has a title, called a caption, on top. This gray
section on top is called a column header. In SQL Server, it displays the
actual name of the column. When using external and friendlier
applications, you will find out that the caption can be different from the
actual name of a column.
The user refers to the column header to know what kind
of data should/must go in a field under a particular column. This is why
you should design your columns meticulously. After identifying a column, a
user can type a value. Except for text-based columns, a field can accept
or reject a value if the value does not conform to the data type that was
set for the column. This means that in some circumstances, you may have to
provide some or more explicit information to the user.
While performing data entry, the user may skip some
fields if the information is not available. The user can skip only columns
that allow NULL values. If a column was configured as NOT accepting
NULL values, the user must enter something in the field, otherwise
he would receive an error and the table would not allow going further. |
|
|

