Creating Reports
 |
Creating Reports |
Report Design Fundamentals
Introduction
So far, we have spent a great deal of time on forms and their design. This was because the users spend most of their time using them. Then comes the time to print data. In Lesson 3, we saw that you could print from a table or a form. The best way to print is through a report and we had a simple introduction in that same lesson. Like a form, a report should be meticulously designed. Unlike forms, some details present a different concern on reports.
As mentioned in previous lessons, a report shares many characteristics with a form. In the Navigation Pane, a report is represented by
a green icon ![]() that you can use to open the report.
that you can use to open the report.
Like a form, once opened, a report is represented by a tab or a title bar (for an overlapped database) that displays its name. By its definition, a report mimics a piece of paper and therefore it uses a white background.
Like a form, a report can be displayed in different views but the report has more varieties.
A Review of Report Creation
As we saw in Lesson 3, to quickly create a report, in the Navigation Pane, click a table to select it. Then, on the ribbon, click Create and, in the Reports section, click Report. Another fast way is by using the Report Wizard. To start it, in the Reports section of the Create tab of the ribbon, you can click the Report Wizard button. This would launch a wizard that you can simply follow (we saw how to use the Report Wizard in Lesson 3).
When it comes to report design, the rules to add and manipulate the controls are the same we reviewed for the form. We studied the techniques of control design in the Lessons 6 and 7. In Lesson 10, we reviewed the common characteristics of database fields. Everything in that lesson is valid for controls positioned on a report. In Lesson 13, we mentioned that, for all of the expressions we learned to create, the techniques and rules were valid for both the forms and the reports.
![]() Practical Learning: Creating a Report
Practical Learning: Creating a Report
Field Insertion on Forms and Reports
Data on fields of forms and reports fall in three main categories: fields that directly originate from a table or a query, fields created as a combination of existing fields, and fields independent of any other fields. The techniques used to create these fields are different but a field created using one technique can be changed into another category as necessary.
If you want to use a field that is already part of a table or a query, before or when creating a report, you must specify the list that holds the fields. There are various ways you can do this:
To add a field to a report, you can either click a control from the Ribbon and click the report, or drag a field from the Field List to the report.
![]() Practical Learning: Starting a Report
Practical Learning: Starting a Report
The Views of a Report
The Design View
One of the ways you can display a report is called the Design View. As seen in previous lessons, to display a report in Design View
As done for a form, in the Design View of a report, you can add, position, format, configure, and manipulate the necessary controls. The Design View is equipped with one or more sections. The primary sections are the Page Header, the Detail, and the Page Footer:

As mentioned when studying form and report design, when a report is in Design View, the Ribbon is equipped with a Controls section in its Design tab. You can use those controls to populate your report. You can also select objects from the Field List and add them to the report.
![]() Practical
Learning: Using the Design View of a Report
Practical
Learning: Using the Design View of a Report
The Print Preview
To have an idea of what a report would look like on a printed piece of paper, you can display it in what is referred to as Print Preview. To do this:
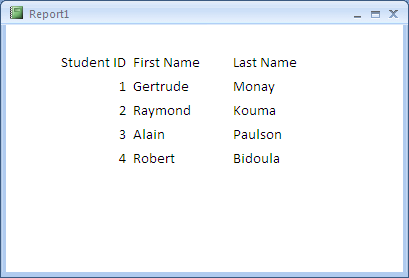
When a report appears in Print Preview, the Ribbon is made of only one tab. To appear realistic, a report in print preview appears as a piece of paper with margins. Its body is filled with the data that would be printed. Here is an example:

The right side and the bottom-right side display a scroll bar each. Like a form in Form View, the Print Preview of a report may be equipped with navigation buttons. The functionality of these navigation buttons is as we described for a table.
After using the Print Preview, to close it, in the Close
Preview section of the ribbon, you can click the Close Print Preview button  .
This would display the report in the view it previously had.
The Report View
The Report View shows a report with its controls and the items in its sections but it does not show the margins:

Unlike the Print Preview, the Report View does not distinguish where a section starts and where it ends.
The Layout View
The Layout View of a report appears as a drawing board. It shows its title bar and its system buttons. In its body, it displays three dotted lines that represent the top section and the margins:

Like a Design View, you can use the Layout View to add and manipulate controls on a report. Unlike the Design View, when a report is in Layout View, the ribbon does not have a Design tab. Instead, it is equipped with a Format tab that has a Controls section; but that section is not similar to the Design View's. To use the controls of a data source, you can drag them from the Field List (to open the Field List, you can click the Add Existing Fields button from the Controls section of the Format tab).
The Sections of a Report
The Page Header and the Page Footer Sections
When a piece of paper prints, it is made of a top section, a body, and a bottom section. To support this, a report can be equipped with a Page Header that represents the top part, a Detail section that represents the body of the report, and a Page Footer section that represents the bottom part.
If you create a report using either the Blank Report or the Report Design options of the Reports section of the Ribbon, the report would be equipped with a Page Header and a Page Footer sections:

If you have a report that does not have these sections, you can add them. To add these sections, you can:
You can use these same techniques to remove the sections.
As mentioned previously, the Page Header represents the top section of the printed paper. Therefore, when designing a report, put in the Page Header the objects you want to display on each top part of the printed paper. For example, you can put the common title or the page number in that section. That section is also typically used to display the title of a brochure or book.
Because the Page Footer represents the bottom part of each printed page, you can put on it the object(s) that would display on each page. For example, you can use it to display the date the report is being printed.
![]() Practical
Learning: Using the Page Header of a Report
Practical
Learning: Using the Page Header of a Report
The Detail Section
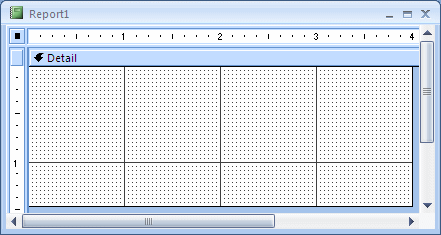
Like a form, to show the sections of a report, it must be opened in Design View. Like a form, the most fundamental part of a report is the Detail section. The detail section holds the most controls of a report. In fact, a report can have only that section. If you create a report using one of the options from the Reports section of the Create tab of the ribbon, the report would come equipped with various sections. To have only the Detail section, you can right-click the report and click the option of those sections to remove them. You may end up with only the Detail section:

You can then equip it with the desired controls. Here is an example:

![]() Practical
Learning: Using the Detail Section of a Report
Practical
Learning: Using the Detail Section of a Report
The Report Header and the Report Footer
As mentioned already, the report is the primary object used to print the data of a database. You may have created a database that represents many objects sold in a store or you could have created a database for a list of people such as the students of a high school. In these cases, you may want to create a report that shows the list. To print a realistic book, magazine, or brochure, you would want to have a front cover and a back page.
To support the cover and the back page, the report can be equipped with two other sections: The Report Header and the Report Footer sections:

If you create a report using either the Report or the Report Wizard options of the Reports section of the Ribbon, the report would be equipped with a Report Header and a Report Footer sections. If you have a report that does not have these sections, you can add them. To add these sections, you can:
You can use these same options to remove the Report Header and the Report Footer sections.
As seen in the above screenshot, you can have a report that has a Report Header and a Report Footer sections without the Page Header and the Page Footer sections. If you have a Page Header and the Page Footer sections but do not want to show them on a printed paper, you can completely reduce their heights:

Otherwise, if you are creating a book or brochure that would represent a list of various items, you should equip it with all these five sections.
![]() Practical
Learning: Using the Report Header Section of a Report
Practical
Learning: Using the Report Header Section of a Report
When to Display a Section
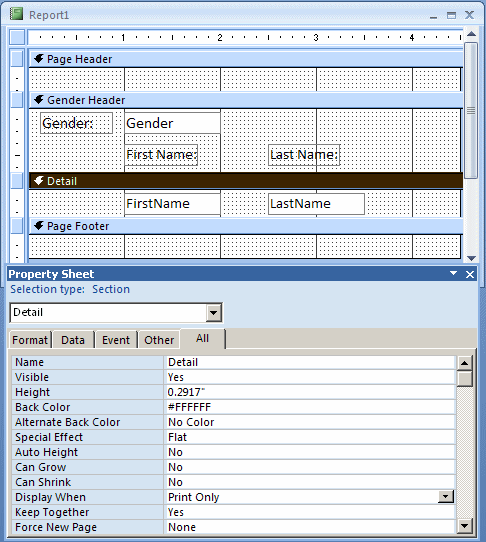
By default, after adding a section to a report, the section would show in Design View and its contents would appear in the other views. If you want, you can hide the section in either the Design View or the other view. This characteristic is controlled by the Display When enumerated property. To apply it, display the report in Design View and access the Properties window of the section on which you want to control this characteristic.
The Display When property has three options:
 |
| Report View |
 |
| Print Preview |
 |
|
The Page Setup of a Report |
Introduction
Page setup consists of customizing some of the behind-the-scenes aspects of a piece of paper resulting from printing. These include the size of a report, the orientation, and others. To assist you with this, when the report is displayed in Print Preview, the Ribbon is equipped with a section labeled Page Layout:

The Page Layout section is equipped with a button labeled Page Setup. When clicked, this button would open the Page Setup dialog box that provide some of the options of the Page Layout section and more.
The Size of a Report
Like a form, a report has a size, which is the combination of its width and its height. When it comes to the height, each section has and controls its own vertical measure. As done for a form, to specify the height of a section:

As seen for a form, the height that a report displays in Design View is the total height of its sections.
When it come to the width of a report, all sections use the same measure. The width that a report shows in Design View is the common width of its sections. Therefore, to specify the width of a report:

To change both the height and the width of the report:

![]() Practical
Learning: Resizing a Report
Practical
Learning: Resizing a Report

The Page Size of a Report
As seen previously, a report is meant to print on a piece of paper whose size is 8.5 by 11 inches. If you want, you can change that size. To do this, while a report is displaying in Design View, you can click the Page Setup tab of the Ribbon and click the Size button:

From the list of sizes, you can click the one you want.
Alternatively, when a report is displaying in Design View, click the Page Setup
tab and click the Page Setup button ![]() .
Then, in the Page Setup dialog box, click Page. In the Paper section, you can
click the arrow of the Size combo box:
.
Then, in the Page Setup dialog box, click Page. In the Paper section, you can
click the arrow of the Size combo box:

You can then click the desired size and click OK.
The Layout of a Report: Portrait or Landscape
Although you can change the size of a report to almost any measures of your choice, in reality, the printing of a report is subject to external influences related to the operating system. In this particular case, these have to do with the printing process followed by the device used to print. The layout of a paper specifies whether the printed result would be considered vertically or horizontally. This is referred to as the report layout or the paper orientation. There are two main options: portrait and landscape.
When a report is displayed in Design View, to check its
orientation, on the Ribbon, you can click Page Setup. By default, a report is
meant to print in portrait and you can see this if the Portrait button is
clicked ![]() .
To configure it for landscape, you have various options. While a report is
showing in Design View, on the Page Setup section of the Ribbon, you can click
the Landscape button. Also, when a report is displaying in Design View, click
Page Setup and click the Page Setup button
.
To configure it for landscape, you have various options. While a report is
showing in Design View, on the Page Setup section of the Ribbon, you can click
the Landscape button. Also, when a report is displaying in Design View, click
Page Setup and click the Page Setup button ![]() .
Then, in the Page Setup dialog box, click Page and click the Landscape radio
button:
.
Then, in the Page Setup dialog box, click Page and click the Landscape radio
button:

And click OK.
If you enlarge the report too much but keep the orientation to portrait, you would receive a warning message box:

|
|


The Margins of a Report
When a report prints, the printer keeps some sections in the left, the top, the right, and the bottom sides empty. These sections are referred to as the margins. The printer is configured to follow some default options for the margins. If you want, you can exercise some control on them. You have two options. To use some preset options, while a report is displaying in Design View, on the Ribbon, you can click the Page Setup button, then click the Margins button. Three preset options would appear.
If one of the three margin options in the Page Setup section of the Ribbon is not enough, you can click the Page Setup button. This would display the Page Setup dialog box:

In the Print Options tab, you can change the values of the desired section(s) as you see fit.
![]() Practical Learning: Setting
the Margins of a Report
Practical Learning: Setting
the Margins of a Report


Zooming a Report
In Print Preview, we mentioned already that a report shows how the printed paper would appear. To give you a better overview, Microsoft Access may "shrink" the view. Although this may make some characters unreadable, the intent is to give a preview of the resulting piece of paper, not necessarily read the contents of the report. If you still want to read the content of the report, you can enlarge its view. On the other hand, if you are not particularly interested in reading the content of the report but preview it, you can shrink the view more or enlarge it more. This is referred to as zooming the view and you can zoom in or zoom out.
Zooming is available and only relevant when previewing a report. Therefore, in order to use it, first display the report in Print Preview. To assist you with zooming, the Ribbon state for the Print Preview is equipped with a Zoom section:

By default, the Print Preview shows only one page of the report and the One Page button of the Zoom section of the Ribbon is clicked. Also, usually in that view, the characters could be difficult to read. To zoom in or zoom out of the view, you can click inside the report itself or click the (top side of the) Zoom button. This would change the zooming ratio. If you want a more precise zoom ratio, you can click the arrow button below the Zoom button. This would present a list of zooming ratios and you can select the one you desire:

As mentioned already, by default, the Print Preview presents one piece of paper. If your report contains more than one page and you want to preview a few or all of them, you can display more than one page. To display two pages, you can click the Two Pages button. To display 4, 8, or 12 pages, you can click the More Pages button and select the desired option.
![]() Practical
Learning: Zooming a Report
Practical
Learning: Zooming a Report


Lesson Summary
MCAS: Using Microsoft Office Access 2007 Topics
| C6 | Create reports |
Exercises
Yugo National Bank
Watts A Loan


|
|
||
| Previous | Copyright © 2008-2019, FunctionX, Inc. | Next |
|
|
||