|
A Windows application primarily appears as a rectangular
object that occupies a portion of the screen. This type of object is under the
management of the operating system: Microsoft Windows. Based on this, for an application to become useful, it must
be opened. An application must have an entry point. On a C/C++ application, this
entry point is a function called main and it can take 0 or more arguments.
This function can use any of the following syntaxes:
int main();
int main(int argc);
int main(int argc, char *argv[]);
int main(int argc, char *argv[], char *envp[]);
Some Microsoft compilers provide or accept this function
with the name _tmain and it can be used as one of the following:
int _tmain();
int _tmain(int argc, _TCHAR* argv[]);
On a Win32 application, the entry
point of a program is a function called WinMain and is defined in the
windows.h library. This function is declared as:
int WinMain(HINSTANCE hInstance, HINSTANCE hPrevInstance, LPSTR lpCmdLine, int nCmdShow);
In Visual C++ .NET, this function is sometimes defined as _tWinMain.
|
 Practical
Learning: Introducing Windows Forms Applications Practical
Learning: Introducing Windows Forms Applications
|
|
- Start Microsoft Visual Studio .NET or Visual C++ .NET
- To create a new project, on the main menu, click File -> New ->
Project...
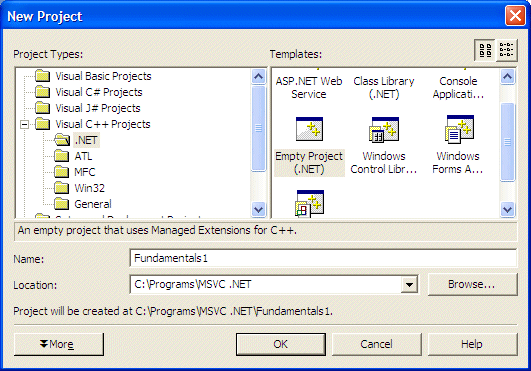
- In the Project Types list, click Visual C++ Projects if necessary. In
the Templates list, click Empty Project
- In the Name text
box, type Fundamentals1 as the name of the project. In the Location
text box, specify a folder or accept the suggested directory:
- Click OK
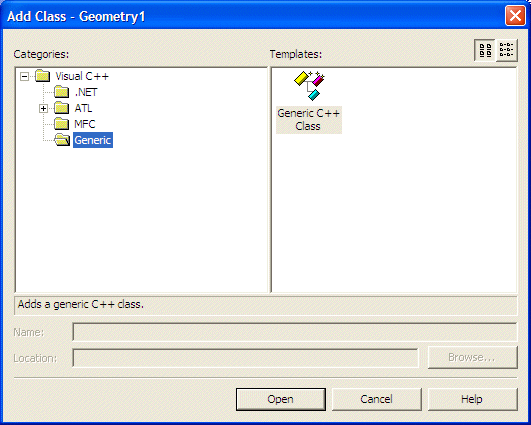
- To add a new class to the application, in Solution Explorer, right-click
Fundamentals1 -> Add -> Add Class...
- In the Templates list of the Add Class dialog box, click Generic
Class
- Click Open
- Set the Class Name to CFundamentals
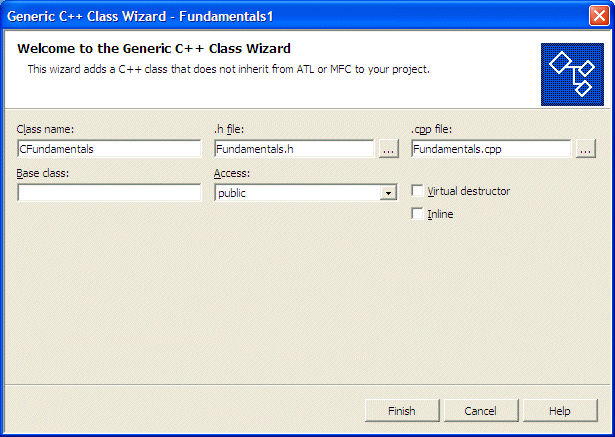
- Click Finish
- In the Fundamentals.h header file, change the class as follows:
#pragma once
#using <mscorlib.dll>

__gc class CFundamentals
{
public:
	CFundamentals(void);
};
|
- Click the Fundamentals.cpp tab and change its contents as follows:
#include <windows.h>
#include ".\fundamentals.h"

CFundamentals::CFundamentals(void)
{
}

int APIENTRY WinMain(HINSTANCE hInstance,
                     HINSTANCE hPrevInstance,
                     LPTSTR    lpCmdLine,
                     int       nCmdShow)
{

	return 0;
}
|
- Save all
Windows Forms is a technique of creating computer
applications based on the common language runtime (CLR). It offers a series of
objects called Windows Controls or simply, controls. These controls are already
created in the .NET Framework through various classes. Application programming
consists of taking advantage of these controls and customizing them for a
particular application. There are various types of applications you can create
with these controls, including
graphical applications (Windows Forms Application), web-based applications (ASP.NET
Web Application), console applications (Console Application), etc.
There are two broad categories of objects used in a Windows
Forms application: the forms and the controls. The objects used in a Windows
Forms application are stored in libraries also called assemblies. As normal
libraries, these assemblies have the extension .dll (which stands for dynamic
link library). In order to use one of these objects, you must know the name of
the assembly in which it is stored. Then you must add a reference to that
assembly in your application.
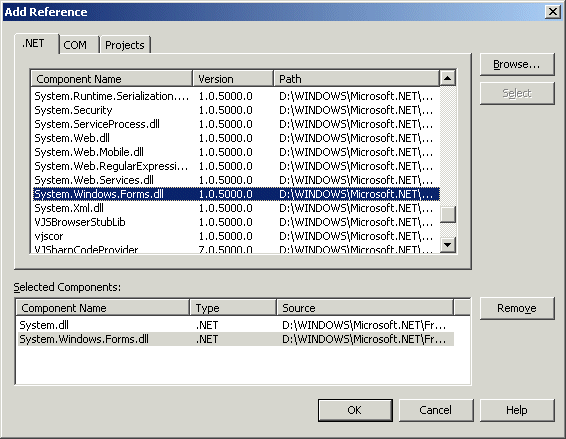
To add a reference to an assembly, on the main menu, you can
click Project -> Add Reference... You can also right-click the automatically
created References node in Solution Explorer and click Add Reference... Any of
these actions would display the Add Reference dialog box from where you can
click the reference, click Select and click OK. If you don't see the reference
you are looking for, you can locate it on another drive or directory using the
Browse button.
A form is the most fundamental object used in an
application. It is a rectangular object that uses part of the computer screen to represent an application. A form is based on the Form class that is
defined in the System::Windows::Forms namespace created in the System.Windows.Forms.dll
assembly. Every GUI application you will create starts with a form. There are
various techniques you can use to get a form in your application: you can
programmatically and manually create a form, you can inherit a form from the
Form class, you can create a form based on another form that either you or
someone else created already, etc.
The primary means of getting a form into an application
consists of deriving one from the Form class.
|
 Practical
Learning: Deriving a Form From the Form Class Practical
Learning: Deriving a Form From the Form Class
|
|
- To add a reference to the assembly in which the Form class is defined, in the
Solution Explorer, right-click References and click Add Reference...
- In the Add Reference dialog box, click the .NET tab if necessary and
scroll down in the list
- Click System.dll and click Select
- Double-click System.Windows.Forms.dll
- Click OK
- To inherit a form from the Form class, change the Fundamentals.h header
file as follow:
#pragma once
#using <mscorlib.dll>

using namespace System;
using namespace System::Windows::Forms;

__gc class CFundamentals : public Form
{
public:
	CFundamentals(void);
};
|
- Save all
The form is the object that gives presence to an
application. Once you have created the (primary) form of your application, you can get
it ready to display on the screen. This is taken care of by the Application
class equipped to start an application, process its messages or other related
issues, and stop the application.
The Application class provides the overloaded Run()
method that can be used to start a program. One of the versions of this method
takes a form as argument. This form must be the first, main or primary form of
your application; it will be the first to display when the application comes up.
|
 Practical
Learning: Starting an Application Practical
Learning: Starting an Application
|
|
- To prepare the application for starting, change the WinMain() function of
the Fundamentals.cpp source file as
follows:
#include <windows.h>
#include ".\fundamentals.h"

CFundamentals::CFundamentals(void)
{
}

int APIENTRY WinMain(HINSTANCE hInstance,
                     HINSTANCE hPrevInstance,
                     LPTSTR    lpCmdLine,
                     int       nCmdShow)
{
	// Instantiate an Exercise object
	CFundamentals *frmMain;

	// Allocate memory for the object, using the new operator
	frmMain = new CFundamentals();
	// Call the Run() static method of the Application
	// and pass it the instance of the class to display
	Application::Run(frmMain);

	// Everything went alright... We hope
	return 0;
}
|
- To execute the application, press Ctrl+F5 and accept to build the project
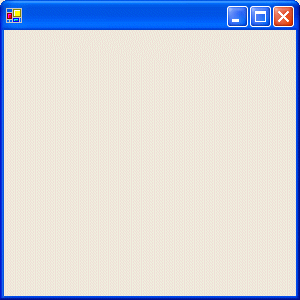
- After viewing it, close the form by clicking its system Close button
 and return to your programming environment
Visual Studio .NET makes it easy to get a form to an
application. The easiest technique consists of creating a Windows application.
To do this, you first display the New Project dialog box, then select Windows
Forms Application in the Templates list. If you had already started an
application, whether it was created as a Windows Forms Application or not, to
add a new form to it, on the main menu, you can click File -> Add New Item...
or Project -> Add New Item.... Then, in the Templates section of the Add New
Item dialog box, you can select Windows Form, give it a name and click Open. A
new form with its complete and necessary skeleton code would be added to your
application, allowing you to simply customize it.
|
 Practical
Learning: Using an Automatic Form Practical
Learning: Using an Automatic Form
|
|
- Click the Start Page tab and click the New Project button
- In the New Project dialog box, make sure Visual C++ Projects is selected
in the Project Types list. In the Templates list, click Empty Project
- Replace the string in the Name box with Fundamentals2 and click OK
- To add a new form to the application, in Solution Explorer, right-click
Fundamentals2, position the mouse on Add, and click Add New Item...
- In the Templates list, click Windows Form (.NET)
- Replace the string in the Name box with Exercise
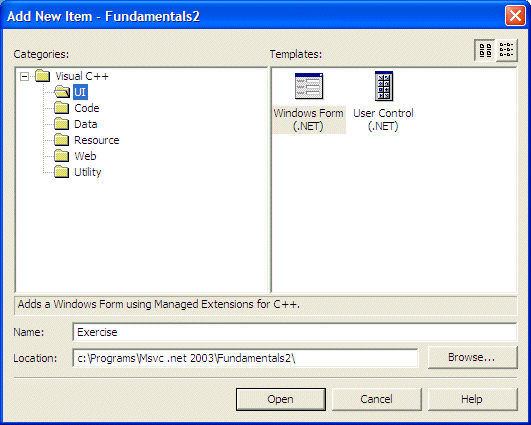
- Click Open
- In Solution Explorer, double-click Exercise.cpp and change its contents as
follows:
#include <windows.h>
#include "Exercise.h"

int APIENTRY WinMain(HINSTANCE hInstance,
                     HINSTANCE hPrevInstance,
                     LPTSTR    lpCmdLine,
                     int       nCmdShow)
{
	Fundamentals2::Exercise *frmMain = new Fundamentals2::Exercise();

	Application::Run(frmMain);

	return 0;
}
|
- Execute the application
- After using the form, close the form and return to your programming
environment
- To display the form, click the Exercise.h [Design] tab
|
|

